Make Miniature Moccasins

moccasin image for blog.jpg

Create adorable moccasins that make a great take-home craft! This craft helps immerse students in Native American and First Nations cultural garb. We have included two templates: a larger one for take-home crafts and a smaller one that creates moccasins to fit on dolls!

Age: 5+

Duration: 10 minutes

Learning Outcomes: Explore Native American and First Nations cultural heritage. Learn about the ways natural materials were used to make practical and beautiful items. Exercise fine motor skills by cutting and folding.

You’ll Need:

Line-22

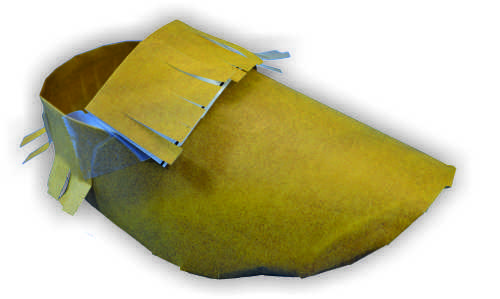
Traditionally, moccasins are made of soft leather (usually deer, although native peoples in Alaska often used seal or caribou leather, depending on the resources available; for more information check out this cool museum!), and are decorated with beads, porcupine quills or fur. Each culture has their own unique styles and designs for moccasins, but the basic design includes a sole (the bottom of the moccasin) and an upper that is stitched together at the top. Some designs also include a vamp (the middle piece that covers your toes and the top of your foot).

Etymologically, the word moccasin derives from the Algonquian language Powhatan word makasin (cognate to Massachusett mohkisson / mokussin, Ojibwa makizin, Mi’kmaq mksɨn), and from the Proto-Algonquian word maxkeseni (shoe).

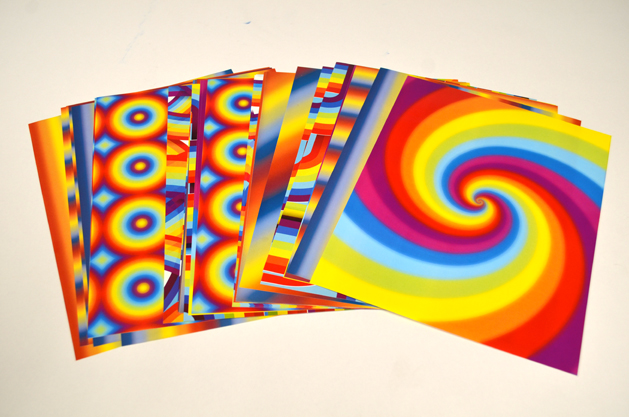
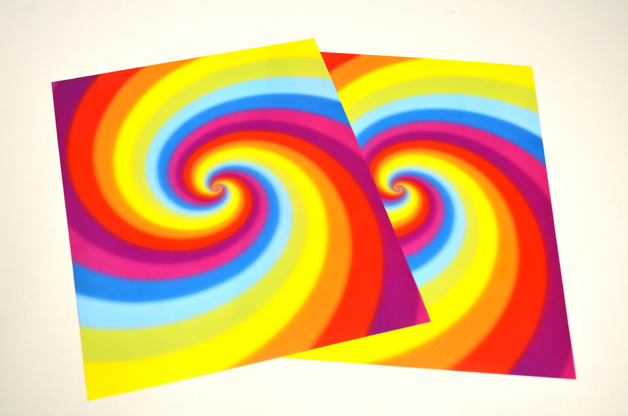
To create your own moccasins, start by downloading the moccasin template, and printing it out on a sheet of craft paper. It may take some experimenting to see which way you need to put the craft paper into the printer so the lines print on the white side. We used the deer hide design for our moccasins, but you can choose your favorite paper!

The Miniature Moccasins template needs two sheets of paper to create one pair of moccasins. The Doll Moccasin template needs one sheet of paper to make two pairs of moccasins.

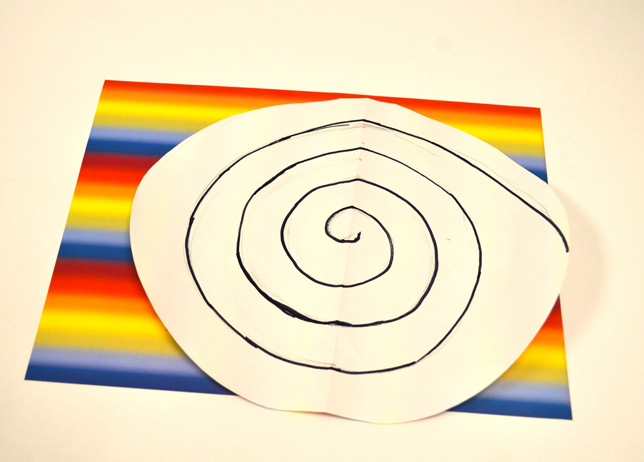
Once you have printed out the template, students can use marker, crayon, glue and collage materials to decorate their moccasins if they want. I suggest decorating before you assemble the moccasin! Once you are ready to assemble your moccasins, cut on the solid lines, and fold on the dotted lines. Next, tape the vamp and upper to the sole of your moccasin. This part can be a little tricky, so we created a video to demonstrate:

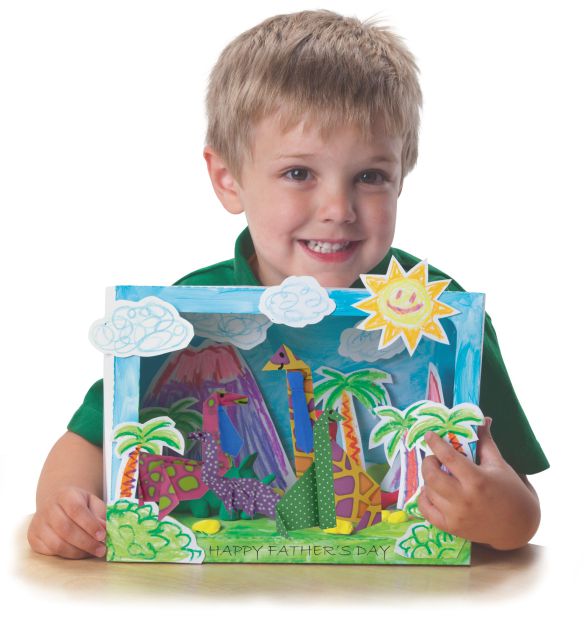
Your moccasin crafts can be a final art product in and of themselves, or they can be added to presentations, posters and reports as visual aids.

Line-01

Like us on FacebookShare this post with your friends, or Subscribe to this blog today to receive original craft project updates every week! 

Origami Dinosaurs

These adorable dinosaurs are the perfect addition to a diorama or as a Father’s day gift to a dino-rrific dad!

Age: 4+

Duration: 10 minutes

Learning Outcomes: Integrate art and science! Exercise fine motor skills. Create adorable take-home art.

You’ll Need:

Line-01

We loved dinosaurs as children and since the real things are sadly extinct, these adorable paper versions of brontosauruses are the next best thing!

The taller dinosaur is simple to fold, and can be made by students as young as four. Since origami instructions can be complicated and difficult to follow when they are written, we have created a video to show you how to fold this adorable dinosaur:

The longer dinosaur is more challenging to fold, and is more suited to older students. Here is the video with the folding demonstration:

The brontosaurus, or Thunder Lizard, was a four-legged herbivore that lived in the late Jurassic. The largest brontosaurs weighed up to 15 tons and measured up to 22 m (72 ft) long from head to tail. Historically, the Brontosaurus was believed to be too big to support its own weight on dry land, so paleontologists thought they must have lived partly submerged in water, maybe in swamps. Today, however, brontosaurs are thought to have lived just on land.

Ideas

  • Once you have folded your brontosaurus, you can add them to birthday or Father’s day cards.
  • Use them with our diorama boxes to add pizzazz to research and reports. fathers day dino diorama.jpg
  • Want to decorate your classroom? Use a hole punch to create holes in your dinosaurs, and string them on yarn to create dinosaur garlands! The 8 different designs and various color schemes of the dinosaur paper will ensure that your garlands will be bright and beautiful.
  • Try using our economy origami paper to fold these dinosaurs. The smaller paper and smaller size of the finished dinosaurs makes them perfect for pop-up cards or necklaces!

dinos different sizes.jpg

Line-22

Like us on FacebookShare this post with your friends, or Subscribe to this blog today to receive original craft project updates every week!

Origami Marble Paper Crown

15401 Marble Paper - Crwon Head

Crown yourself with a simple origami craft that the Greek statues would be proud to wear!

Age: 5+

Duration: 10 Minutes

Learning Outcomes: Exercise fine motor skills as you fold and construct this crafty crown. Create costume pieces for dramatic play.

You’ll Need:

Line-08

Start with a single sheet of marble sculpture paper. To complete this crown you will need 3-4 sheets of paper, depending on the size of your head but I want to start by walking you through the basic component. Start by folding the sheet diagonally, and cut off the excess. Unfold the triangle; you should have a square sheet. Fold the square sheet in half, then open it, and place the white side up on the table.

For the rest of the folding instructions, I have created a video for you:

  1. Fold the top two corners to meet at the center fold line. Your sheet should have a point at one end.
  2. Fold the square bottom up to meet the bottom of the arrows. Crease firmly.
  3. Fold the folded rectangle up, and flip the whole sheet over. You should have a triangle with flaps sticking out from behind on either side.
  4. Pleat the triangle by folding it down, then folding it up approximately 1/2″ above your first fold. Repeat 1-2 times to create the graduated steps that serve as decorations.
  5. Repeat steps 1-4 three more times, until you have four components.
  6. Choose one component. Lay it on the table in front of you with the triangle’s point facing away from you. Open the component so you can see the white inside. Slide the squared edge of another component onto the white area, overlapping the two pieces by 1-2″.
  7. Fold the rear flap and triangle over top of the second component.
  8. Carefully slide a third component into the second component, repeating steps 6-7. Be careful not to pull the second component out of the first component.
  9. Add the fourth component into the third component.
  10. Now it’s time to finish the loop and make your crown wearable. Using steps 6-7 again, place the free end of the first component inside the free end of the fourth component. Now you should have a “seamless” loop. The components can slide in and out of each other, so you can make small adjustments for individual head sizes. For adults, you may need to add a fifth component. Very young children may only need three components.

You can even make a crown for your best furry friend:

15401 Marble Paper - Crown Bunny

Line-01

Like us on FacebookShare this post with your friends, or Subscribe to this blog today to receive original craft project updates every week!


Sensory Collage Easter Egg Art Project

Are you looking for Easter egg ideas? The sensory collage Easter egg art project is great for your classroom activities. It introduces children to the important senses of the human body with Roylco’s Sensory Collage Kit. It’s also great for working on fine motor skills.

Age: 5+

Duration: 15 minutes

Learning Outcomes: Exercise fine motor skills. Practice sorting materials by color and texture. Learn about collage art. Develop sensory awareness.

You’ll Need: 

Pull out a wavy sheet from the R15413 Sensory Paper package, choose your favorite pastel color, and draw an outline of an egg. Encourage kids to slowly move their palms and fingertips over the paper to feel the small raised patterns. Some kids may want to follow the patterns on the paper to create their designs, while others may want to create their own designs. You can color the wavy lines on the paper and it will divide the egg into different sections. You can make these lines as bold as you like.

Next, plan and place the sensory art materials you like on your egg. The Sensory Collage Kit contains 20 different sensory art packs to use in creating unique illustrations.

Before gluing the sensory art materials onto the artwork, you can play with the colors and the different textures. Think about which sensory art materials would best represent your Easter egg artwork.

Encourage children to talk about the color and the texture they use on the artwork and discuss what they feel. Is the color a warm color or a cool color? Is the material rough, hard, scratchy, smooth or bubbly? After exploring the materials, children can start to glue the sensory materials onto the artwork.

The artwork is almost finished. Have the children cut out the egg and glue it on to the  cardstock. Here is our sensory collage Easter egg artwork. Write your name on the artwork and take it home for your Easter celebration!

For more information please visit https://roylcostore.com/products/sensory-collage-kit 


Bundle Savings

Get all the Roylco items used
in this project and save 15%!

$47.58 USD
bundled price
Add Bundle
to Cart


Make your own Origami Rabbit

Are you looking for more Easter ideas this week? Making origami rabbit is fun and easy. Today we are going to show you how to make these cute origami rabbits.

Age: 4+

Duration: 6 Minutes

Learning Outcomes: Practice following step-by-step instructions while exercising fine motor and spatial skills.

You’ll Need: 

Step-by-step Instructions ( Please see the graphic above ):

  1. Fold your paper in half to make a triangle.
  2. Fold the creased side of the triangle up about 3/4″.
  3. Fold one side toward the center, line up the points and crease.
  4. Fold another side toward the center. Line up the points and crease.
  5. Fold the bottom up.
  6. Flip it over. Fold the top point inside to create the top of the rabbit’s head. You can see the rabbit’s head is ready now.
  7. Let’s work on the rabbit’s body. Take another piece of paper. Please check the graphic, fold one side of the paper to make a triangle. Then line up the points and fold another side into a triangle.
  8. Flip it over. Align with the point at the bottom, fold the paper to make a triangle. Then line up the points and fold another side into a triangle.
  9. Align with the points in the middle, then fold the shape into half to create a rabbit’s body. Put the rabbit’s head on the top of the body. The basic shape of rabbit is ready.

Ideas:

  • Roylco’s R15219 Elemetary Origami Animals pack provides different patterns and bright colors of origami paper. Contrasting colors are printed on the reverse side. Use the fun bright paper to create your own designs.
  • You can draw different cute facial features on the rabbit. Or you can use other craft paper to cut out the features and glue them on the rabbit.
  • Check out our blog post on “How to make origami carrots” and make a couple of carrots for your rabbits.
  • Display the rabbits somewhere festive, hide them around the house, or around the neighborhood where friends might find them.
  • Punch a hole at the back of the rabbit. Thread a piece of yarn with all the rabbits you make. Hang the rabbits from the ceiling or use them to decorate bulletin boards, doors and hallways!

Please visit https://roylcostore.com/products/elementary-origami-animals for more information.

Color Diffusing Easter Egg Artwork

Make beautiful color diffusing Easter Egg Artwork by using Roylco’s R15213 Color Diffusing Paper™!

Age: 3+

Duration: 5 minutes for painting and assembling, couple of hour for drying.

Learning Objectives: Use fine motor skills to squeeze paint from pipettes onto paper. Learn about the process of diffusion with beautiful Color Diffusing™ technology.

You’ll Need:

• R15213 Color Diffusing Paper™

• R54470 Junior Heart Paint Pipettes

• Watercolor paint

• Paint tray

• A Cup of water

• Cardstock

Use white chalk to draw an outline of an egg on to Roylco’s R15213 Color Diffusing Paper™ . Then create some patterns to design your egg. I also wrote ” Happy Easter” in the middle of the egg. Encourage children to use their imagination to create their own designs.  

Next, place the paper in the paint tray. Wet the R15213 Color Diffusing Paper™, and use Roylco’s R54470 Junior Heart Paint Pipettes to drip liquid watercolor paint over top of the wet surface. Encourage children to experiment with different color palettes. It’s lots of fun for children to play with different colors and watch the colors flow and blend to create spectacular patterns and effects.. This is a great time for children to learn about color mixing, ask the children to discuss the effects of color mixing.

Let the artwork dry in the paint tray for couple of hours.  You can also use a blow dryer to dry the artwork. You can see the result is unexpected and beautiful.

The color diffusing Easter egg artwork is almost ready. Once the paint is dry, you can cut the egg out and glue it on to the cardstock.

For more information please visit https://roylcostore.com/products/color-diffusing-paper-9×12

Bundle Savings

Get all the Roylco items used
in this project and save 15%!

$15.62 USD
bundled price
Add Bundle
to Cart

A Pot Of Gold for St. Patrick’s Day

Are you looking for craft ideas for St. Patrick’s Day? Create some decorations to make the house and classroom more festive. Lets make a spiral rainbow and pot of gold.

Age: 4+

Duration: 5 minutes

Learning Outcomes: Exercise fine motor skills. holiday activities. Makes a perfect take-home craft.

You’ll Need:

Choose your favorite pattern from Roylco’s R15295 Rainbow Paper Pack.

Draw a spiral at the back of the paper.

You can also glue two pieces of rainbow paper together to create a double-sided sprital.


Use scissors to cut from the end of the outline toward the center to make a spiral.


Take two pieces of metallic paper from Roylco’s R15409 Economy Metallic Paper Pack.

I choose dark green paper to make the pot, and the gold colored paper for the golden coins. Draw the shape of a pot at the back of the green paper, and cut it out. Make the coins by cutting out some circle shapes from the gold paper. Then glue the golden coins on to the green pot.

After you finish making a pot of gold, you can glue it to the end of the rainbow.  Once complete, hang from ceilings, on bulletin boards or anywhere that could use some extra color.


You are the pot of gold at the end of my rainbow!

Bundle Savings

Get all the Roylco items used
in this project and save 15%!

$19.19 USD
bundled price
Add Bundle
to Cart

Make Cross Weaving Mats for this Easter !

Let’s make cross weaving mats for this Easter! With this simple project, the art of weaving colorful strips of paper through a bright Cross Weaving Mat promotes hand-eye coordination!

Age: 4+

Duration: 8-10 minutes

Learning Outcomes: Explore cultural traditions and symbols. Practice folding and taping. Exercise Fine motor skills. Create a take-home craft.

You’ll Need:

Weave a colorful Cross!
• Begin by gently separating the weaving strips from the panel and loosening the die-cut slats of the cross. Allow four strips per cross.

• Start by weaving the vertical area of the cross. Insert a strip through the slats of the
mat and weave in and out. When you have finished the first strip, start the second but
alternate the “in and out” pattern each time. A wavy, checkerboard pattern will appear.

• Trim off the excess weaving strip lengths and use to complete the cross bar of the cross.Carefully glue or tape the ends down on the backside of the weaving mat. Notice the different color combination you have created on the reverse side.

Tape your finished cross to a window for inspirational window art or decorate a Bible
classroom doorway. Use several Cross Weaving Mats to decorate a bulletin board for Easter!

Celebrate The Lantern Festival with Stained Glass Lanterns

Create luminous lanterns to string up in your classroom or send home as great gifts! The 3D lanterns are cleverly designed to make assembly easy for little hands. Lanterns are a wonderful example of a cultural and historical artifact that you can discuss
in your next social studies class.

Our stained glass lanterns look a lot like the Andon and Crystal Magic lanterns used in Japan and China, respectively. Your students can be creative and can color in the lanterns any way they like. Adding stained glass to a lantern is a recent trend of turning a practical or useful lamp into a pretty and decorative piece of art.

Age: 4+

Duration: 10 -13 minutes

Learning Outcomes: • Develop fine motor skills • Explore creativity
• Discover lantern and stained glass history   • Use basic design techniques to develop ideas • Learn about Chinese and Japanese lanterns • Combine social studies with arts and crafts  • Use multiple media to create a multi-use craft

You’ll Need:

  1. Each of the lanterns features 4 sky-themed designs. Each design is made to look like a stained glass window. The illustrations include a sun, moon, butterfly and bee. Cut out sections of colored tissue paper or R15275 Stained Glass Paper to glue under the designs.
  2. You can use different colors for parts of one illustration. For instance, paste white tissue paper pieces over the bee’s wings. Alternate and paste yellow and black tissue paper pieces across the separate sections of the bee’s body.
  3. Fold in the lantern along the pre-scored creases to make the lantern three dimensional.
  4. You’ll notice that its side edges are slightly smaller than the rest of the tab. These side tabs will help hook the tab in place when you insert it into the slot. Gently open the slot to loosen it up. Insert the tab into the slot by edging in first one side of the tab then the other.
  5. Finally, fold in all four tabs on the sides of the triangular roof flaps.
  6. Pass a length of fishing line, yarn or string through the holes of all four
    roof tabs and tie a knot at the top to secure.

Now you can hang your lantern along a length of string with other lanterns in sequence or you can hang the lantern directly from the ceiling.

Celebrate Chinese New Year or the start of spring by stringing up the lanterns. You can also send the beautiful lanterns home as Mother’s Day gifts or for any other special event.

Please visit https://roylco.com/shop/r52093-stained-glass-lantern/ for more information.

Bundle Savings

Get all the Roylco items used
in this project and save 15%!

$16.64 USD
bundled price
Add Bundle
to Cart