The “Helping Hands” Good Deeds Display

Image of Roylco Color Diffusing Hands artwork display on school hallway

Image of Roylco Color Diffusing Hands artwork display on school hallway

Special Post Contribution: By Amy Klossner

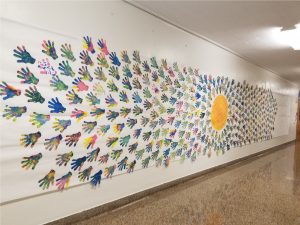
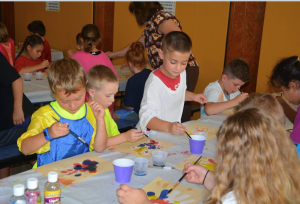
Here are the photos of the project our school completed using Color Diffusing Hands.  They were just perfect.  We read the book Ordinary Mary’s Extraordinary Deed, before painting the hands with liquid watercolors.  It’s a story about a little girl who does one good deed and that person does 5 good deeds then those people do five more good deeds each and so on. Like I said, the hands were perfect for displaying to the students how one good deed (represented by the hand) grows into five more, (represented by the fingers) which grows into 5 more, etc. The “helping hands” displayed that kindness is contagious.

As a spin off, students can write good deeds they are preforming in our school and community on each one of the hands, heart shapes or other inspirational design.


Close up boy decorating color diffusing hand


Close-up of a decorated hand


Children decorating Color Diffusing Hands with liquid water color

How to Decorate Color Diffusing Hands:

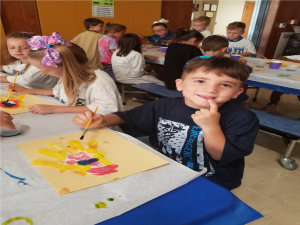
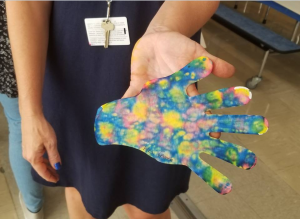
Liquid Water Color:  To get the most beautiful color blends, I recommend using liquid watercolor paint in a mister bottle. Spray the colors you like onto the Color Diffusing Hand.  Then use another mister bottle to spray clean water over your colors. Set aside to dry. Be careful where you put them, they can make a mess. To speed up the drying time, I like to hang them up for good air circulation. They should be dry enough to use in about 30 mins.


Washable Markers:  Color the Color Diffusing Hands with washable markers. Do not cover the whole area. Make sure to leave white space. Use a mister bottle to spray clean water over your colors. This will allow the colors to “mingle” and spread.


Image of sketch drawing of Kid 1

Paper Fortune Cookies

fortune cookie finished craft.jpg

An adorable way to send small notes of praise or encouragement!

Age: 5+

Duration: 5 minutes

Learning Outcomes: Explore cultural assumptions and symbols. Practice folding and taping. Exercise Fine motor skills. Create a cute take-home craft.

You’ll Need:

Line-01

  1. Use a small loop of tape to secure a tissue circle to the center of the white side of a craft circle.
  2. Fold the paper circle in half, with the printed side of the craft circle on the outside. Crease approximately an inch in the center of the fold. Leave the rest of the fold un-creased.
  3. Unfold the circle. Turn it 90 degrees.
  4. Fold the edges of the circle on either side of the center crease in so they overlap slightly. Do NOT crease.
  5. Use the center crease as a fold line to fold the tube in half. Do NOT crease.
  6. Use a small loop of tape to secure the two sides together, forming the completed fortune cookie.

Ideas

  • Include fortunes! On a small strip of paper (approximately 1 x 3″) write a message or short, encouraging phrase. Insert the strip of paper into the tube before you fold it in half, and continue as instructed. Present the fortune cookie to a friend on their birthday, Valentine’s day, or any day as a random act of kindness!
  • Create a fortune cookie garland! String several fortune cookies on a piece of yarn and hang the garland from the ceiling, around a door or window, or along a desk!
  • Try reversing the direction of your first fold! This will create a fortune cookie with a white and tissue outside and a patterned inside.

Bundle Savings

Get all the Roylco items used
in this project and save 15%!

$16.56 USD
bundled price
Add Bundle
to Cart

Line-17