Accordion Critters

R10300-A

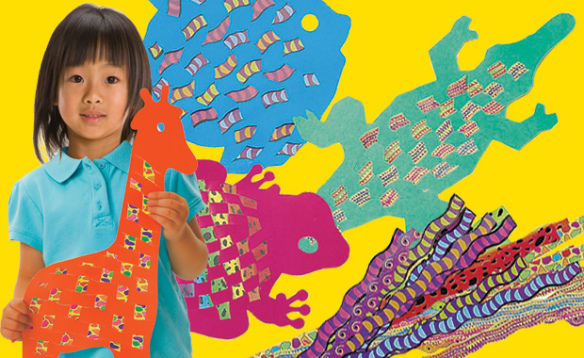
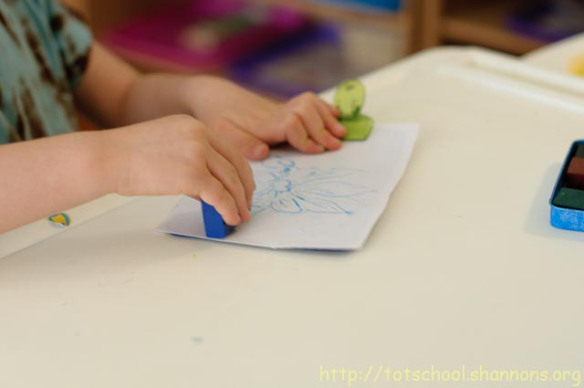
Bounce around with R10300 Accordion Critters! Use the full color animal projects to teach children how to fold paper accordion style—an essential exercise for developing fine motor skills.

Paste the finished accordion-folded legs onto the cute animal characters and string them up to use as puppets! Encourage creative thinking with dramatic play, literacy, basic lessons in biology and physical education.

10300-Illustration-01

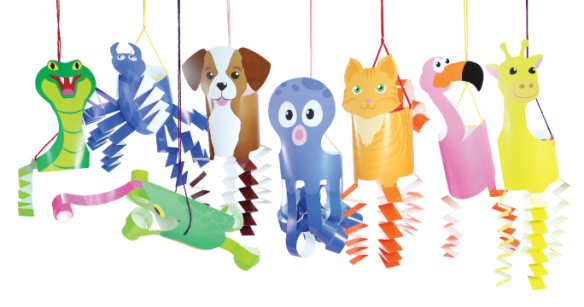
The Accordion Critters are printed in full color and simply need to be popped out of the paper backing. There are 12 different kinds of animals. Pick a cat, dog, snake, frog, elephant, pig, spider, octopus, monkey, sheep, flamingo or giraffe. Each animal has different indications for where the paper strips go.

Before assembling the animals, exercise your students’ understanding by asking how many legs each animal has. They can use the markers on the animal bodies to determine how many legs are required, or they can guess. Not all of the animals in the pack have the same number of legs. In fact, the animals with the most legs are the octopus and spider! Give the octopus and spider to older students, or partner two students together to complete these animals.

10300-Illustration-02

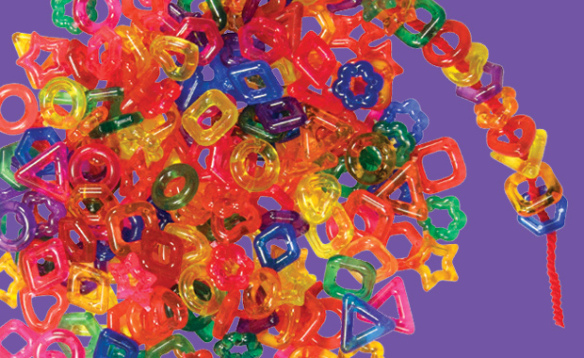
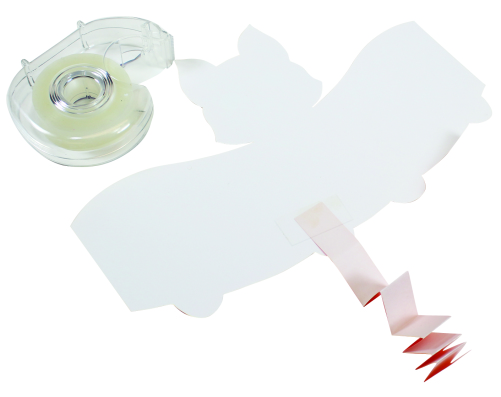
Start with the separate pile of paper strips. The paper strip colors coordinate with the color of the critters’ body. Accordion fold the strips or combine with other colors to make interesting braid patterns. Note: We suggest that younger students use the basic accordion
folding technique to make their Accordion Critter legs. Older students can exercise fine motor skills while adding a new paper folding technique to their repertoire!
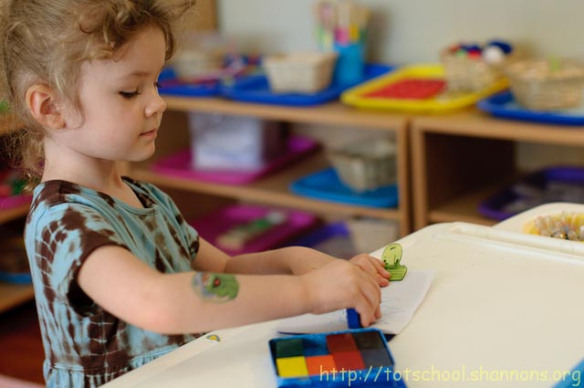
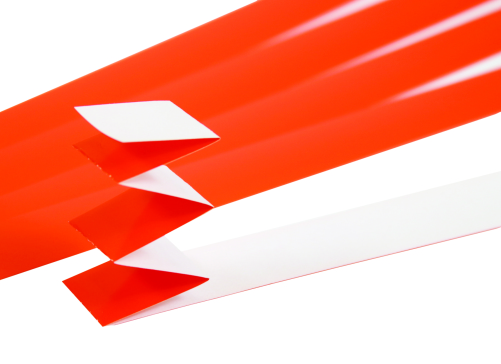
To accordion fold the legs, start at the top. Fold the edge of the paper strip down about 1” (2 cm) then flip the strip to the opposite side and fold down 1” (2 cm) again. Continue doing this all the way down the length of the paper strip.

10300-Illustration-03

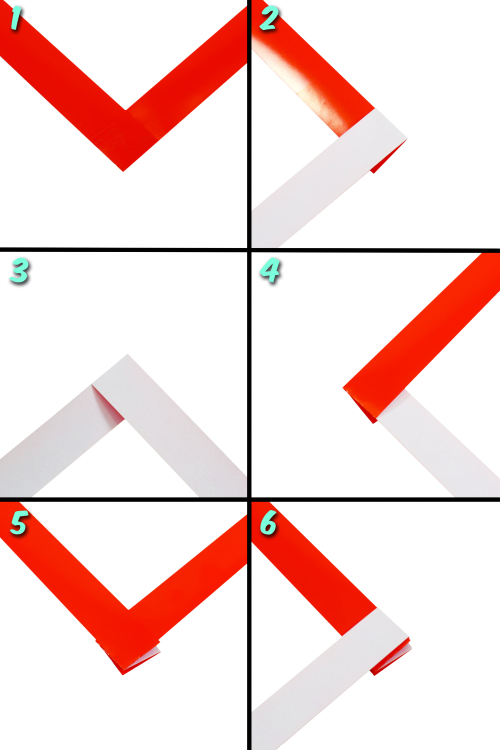
To braid the strips, place one paper strip face down on a flat surface. Place a second paper strip on top of the previous strip, of a 90° angle to the top edge. Flip the second paper strip so that it faces upwards. Tape the two strips together. Fold the bottom paper strip up and over the top strip so that it goes in the opposite direction. Repeat for the second paper strip. Continue folding the paper strips up and over each other all the way to the end. At the very end of the braid, tape the ends together to secure the entire braid. If you braid two different colors, you’ll notice that the colors alternate throughout
the braid.

10300-Illustration-04

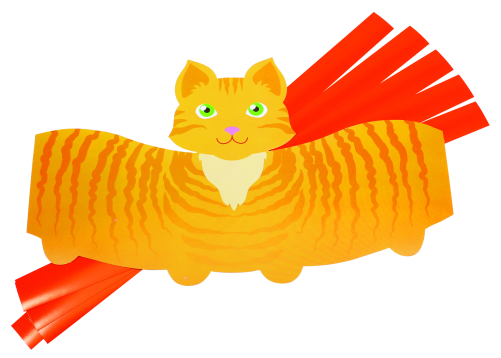
Lay the Accordion Critter on a flat surface and attach the legs onto the leg base with tape. Hold the Accordion Critter up at its sides. Notice the two side edges are flat and line up when you curve the body. Join the two sides together to make the Accordion Critter body curl into a cylinder. Secure with tape. Add tongues to the frog and snake. You can curl or accordion-fold the tongue.

10300-Illustration-05

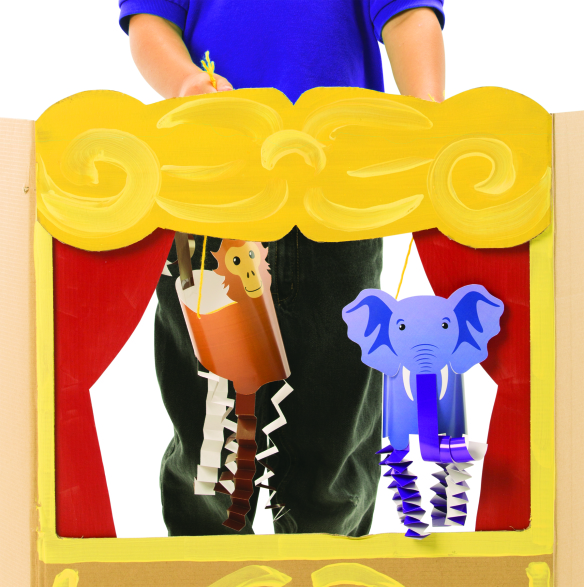
To finish the Accordion Critter, cut a length of string to hang the Critter. Tie the ends of the string onto the pre-punched holes at the sides of the Accordion Critter. Children can grasp the middle of the string to hold the Accordion Critter up like a puppet. You can additionally hang the Critter off a ledge or from the ceiling using a hook or piece of tape. Accordion Critters are fun to play with! Exercise both fine and gross motor skills with paper folding and with puppetry!

Line-07

Like us on FacebookShare this post with your friends, or Subscribe to this blog today to receive original craft project updates every week!

Jack O’ Lantern Weaving Mats

jack o lantern weaving mats

Weave beautiful bright patterned strips through lovely weaving mat pumpkins, pre-cut for a ready-to-use fine motor activity!

Weaving mats are a great way to encourage fine motor development in young children. It’s a skill that’s inherent to finger work as tying the laces on one’s shoe or learning to use a writing tool.

jack o lantern weaving mats

The Jack-O’Lantern Weaving Mat kits come with 24 pumpkin weaving mats, and several different patterned strips.

jack o lantern weaving mats

Weave the strips horizontally across the mat, going over and under each progressive slot. As you start the next row, be sure to begin weaving the opposite way that was done in the row prior. So for instance, if you started the row by first weaving under, start the next row by weaving over.

jack o lantern weaving mats

Here is a close-up of the process as one of our art campers finishes up her pumpkin weaving mat.

jack o lantern weaving mats

You can choose several different patterns of weaving strips that are all thematically printed to accentuate the pumpkin weaving mat.

jack o lantern weaving mats

Each weaving mat is accompanied with glowing Jack-O’-Lantern features in various shapes and designs. Mix and match the features to make a unique Jack-O’-Lantern!

jack o lantern weaving mats

The last step is to decorate the pumpkin faces with two additional leaf graphics. Paste them directly onto the pumpkin face.

jack o lantern weaving mats

Paste the green vines to the tops of the pumpkins. Use the blunt edge of a pair of scissors to curl the vines. You can paste the pumpkin weaving mats onto a length of ribbon to use as a classroom decoration!

Line-13

Like us on FacebookShare this post with your friends, or Subscribe to this blog today to receive original craft project updates every Monday, Wednesday and Thursday!

Paint Pad Leaf Prints

paint pad leaf printing

Make delightful, colorful prints on the Paint Pad. The Paint Pad allows you to create multiple prints using combinations of textures and color on a unique gel-like surface!

Age: 4+

Duration: 10+ minutes

Learning Objectives: Learn to use multiple media to produce interesting colorful effects. Use fine motor skills to press down printing paper and to apply paint and materials to the pad. Discover the visual differences between positive and negative space. Discuss how certain materials affect the prints being made.

DSC06886

You’ll Need:

R54480 Paint Pad

• Tempera or acrylic paint

• Paint brush

• Printing sheets

Stencils, textured paper

Line-20

The Paint Pad provides students with hours of fun and play! The gel-like surface is soft on hands and great for tactile exploration. Students can fingerpaint on it if they wish, but paint tends to glob up on the surface. In case of this happening, use thicker card sheets to draw up the paint better.

The Paint Pad comes with a tray for stability and easy cleanup, as well as a protective cover that can be overlain on the surface of the pad to be stored until another activity.

DSC06888

We recommend spreading the paint with a sponge brayer or a thick bristle paintbrush. Cover the entire gel surface of the pad with paint.

DSC06898

Add a second color to the first. In this canvas, we mixed in a bit of yellow to match the red background. Don’t completely mix the two colors, however. You will want to keep the streaks of paint that show up in between, as this adds more interesting effects to your prints later on.

DSC06907

Place a stencil-like shape on top of the paint. You can use a found shape, such as the leaf we found above.

DSC06909

Place a sheet of paper on top of the Paint Pad to cover the entire surface. Use the palms of your hands to smooth the paper out and pick up as much of the paint as possible.

DSC06914

Grab the sheet of paper by the corners and slowly pull it up off the Paint Pad. You’ll feel it slightly stick to the paint as you peel it back. Just remember to go slowly and gently.

You can already see that the area around the leaf has been colored in while the center of the leaf is not. This created a negative space in the print, or an area of no color that exposes the background.

DSC06921

At this point, you can make a second print! Carefully remove your stencil off the Paint Pad. Press another sheet of paper down onto the pad and smooth it out. Peel the paper back to reveal your second print.

As you can see in the image above, the leaf stencil left behind some markings that were picked up in the second print. You can see the edges of the leaf and the leaf veins that strike out from the center of the leaf imprint.

DSC06931

We finished off with a third print like this one. Making multiple prints also helps to lift up most of the paint so you are in fact cleaning it as you go!

Tip: To clean any stains, use baby wipes or a bit of hand sanitizer and a paper towel for any dried-up paint.

Line-16

Like us on FacebookShare this post with your friends, or Subscribe to this blog today to receive original craft project updates every Monday, Wednesday and Thursday!

Spotlight on… Squiggle Pipettes

squiggle pipette painting watercolors

We recently revamped our pipette line with a few new designs! One of the new designs is our fabulous Squiggle Pipettes. Learn more below!

squiggle pipette painting watercolors

Squiggle Pipettes feature an interesting squiggle design that helps to distribute paint evenly onto paper. Learn more about this product here! Pipettes are not only a great tool to use for painting, but can be incorporated into fine motor exercises–the motion of squeezing the bulb helps to get kids working out their pincer grip! If you are planning to paint with the pipettes, use watercolor paints.

To use your pipettes, first squeeze the bulb to press out all the air. Dip the nozzle into a container of watercolor and release the bulb to suction the paint into the pipette. Squeeze the bulb again to release the paint over your sheet of paper.

[youtube https://www.youtube.com/watch?v=QmCBhIL4COc]

You can use the Squiggle Pipettes to color your art! Here are some ideas you can try for yourself! Click on the links to be taken to the full tutorials.

 • Make your own giant weaving mat using only Color Diffusing Paper, paint and Squiggle Pipettes! Cut the dried colored paper into strips and weave them in and out of each other to make a beautiful woven mat.

Learn our secret for color-resist painting! We use Squiggle Pipettes to add color to the flag designs.

Color your own clothes! A paper vest, that is. Find more about how to design your own vest at the link.

• Form your art into beautiful images of animals using basic shapes! Squiggle Pipettes are used to make the painted images.

Line-16

Like us on FacebookShare this post with your friends, or Subscribe to this blog today to receive original craft project updates every Monday, Wednesday and Thursday!

Christmas Tree Heart Mosaics

2014-11-26-FeatureImage

Christmas is a month away, but what better way to get into the holiday spirit than to build your own tree on paper using our R15367 Heart Mosaics!

Age: 4+

Duration: 10 minutes

Learning Objectives: Layer multiple pieces together. Identify biggest to smallest and coordinate similar colors. Make associations between the shapes in order to create a larger picture. Develop fine motor skills through sorting, placing and gluing the pieces. Discuss triangles as a geometric shape and use

You’ll Need:

R15367 Heart Mosaics

R22052 Double Color Card Sheets

• Glue

Line-06

This is an easy project to do, but makes a great activity for students as they are waiting to transition between class periods or as a thematic holiday art project.

P1015794

This activity requires very little preparation; all you need are materials that you may already have in your classroom! Give each group of students a pile of Heart Mosaics to sort through. Although we’ve chosen a purple background for our Christmas tree, you can use any color from the Double Color Card Sheets set as a backing to your designs.

P1015796

This step allows you to talk a little bit about the basic structure of a Christmas tree. It isn’t just lights and decorations. The shape of the tree is important. Traditionally, most Christmas trees should have the basic shape of a triangle, which is what we are going to make first with our Heart Mosaics.

Ask your students to separate their Heart Mosaics into like colors of green. We have several different colors of green to choose from, so all students will get a chance to make trees.

P1015800

Start with the largest Heart Mosaic pieces first. Locate the largest pieces and place them upside down at the bottom of the card sheet. Make a wide base.

P1015801

Add a few more upside-down pieces to the base, moving upward. Angle the ends of the Heart Mosaics inwards so that the shape of the overall tree takes on a triangular form.

P1015805

Keep adding and angling the smaller Heart Mosaics inwards as you progress to the top. Choose two small and skinny Heart Mosaics to form the peak of the tree.

P1015807

Now it’s time to decorate. Select several smaller Heart Mosaics to form the ornaments as pops of color. Turn the Heart Mosaics right side up and place them on top of the green tree.

P1015812

Decorate the tree just as you would at home! Space out the ornaments in an even, balanced way.

P1015813

Finally, top your Christmas tree with a bright yellow Heart Mosaic. Glue down all the pieces. Students can take their Christmas trees home or tack them up on a board as part of a Christmas display!

Check out another great project with Heart Mosaics:

Make a beautiful tree of hearts for Valentine’s Day cards, for a birthday or just to show someone how much you love them!

Line-06

Like us on FacebookShare this post with your friends, or Subscribe to this blog today to receive original craft project updates every Monday, Wednesday and Friday!

Paint Bellows Tree

P7290065feature

Use process-based methods to create colorful tree artwork! The techniques used involve materials such as Paint Bellows, fingerpaint and Squiggle Pipettes, all combined to give your students an exercise in fine motor development while enjoying the result of the final image. 

Age: 3+

Duration: 10 minutes

Learning Objectives: Explore process artwork through fine motor activity. Use Paint Bellows and Squiggle Pipettes to exercise squeeze-and-release motions using various finger coordination. Achieve harmonious effects with 3 different art techniques. Enhance image association through fluidly and unidirectionally moving the pipette to make a tree trunk, spritzing paint to make the tree leaves and pressing fingerpaint onto the paper to make apples. Create results with process-based art!

You’ll Need:

R54460 Squiggle Pipettes

R5419 Paint Bellows

• Fingerpaint in tree colors (green, brown, red)

• Card paper sheet (8.5 x 11″)

• Paint tray

Line-04

Educators are always looking for ways to add process steps to their students’ learning activities. Instead of merely focusing on the process, guide students to make beautiful artwork through step-by-step fine motor exercise using several different tools–Paint Bellows, Squiggle Pipettes and their own fingers!

OLYMPUS DIGITAL CAMERAYou won’t need many materials to make this artwork! Place the sheet of card paper inside a paint tray. I use card paper in this project to help withhold it shape under the paint.

OLYMPUS DIGITAL CAMERAMix one part brown paint with one part water to make the paint watery for the Squiggle Pipette. To use the Squiggle Pipette, dip the nozzle into the paint, and squeeze the bulb to release all the air. Release the bulb while holding the nozzle in the paint to draw in some of the paint.

OLYMPUS DIGITAL CAMERATo paint with the Squiggle Pipette, release the paint onto a sheet of card paper. Start from the bottom of the sheet, squeeze out a bit of paint, then draw up the Squiggle Pipette while continuing to squeeze the paint out. This will produce a tree-trunk base for the tree artwork.

OLYMPUS DIGITAL CAMERAUse the remaining brown paint in the Squiggle Pipette to make offshoots from the main tree trunk. These will form the boughs and branches of the tree. A good technique is to squeeze a bit of paint out from the center of the tree, then draw the pipette outwards from the center to make a wispy, crooked branch.

Add a few lines at the bottom of the tree trunk to form the tree’s roots.

OLYMPUS DIGITAL CAMERASqueeze a bit of thick green paint into a bowl. NOTE: Do not water down this paint! In order to effectively use the Paint Bellows, you will need to use very thick paint. This helps to achieve the splatter effect better than using watered-down paint.

To use the Paint Bellows, first squeeze the top and bottom of the accordion chamber together. This will release all the air from the chamber.

OLYMPUS DIGITAL CAMERAHold the Paint Bellow taut as you dip the nozzle into the paint, then release the top and bottom to allow the chamber to draw in the paint. You can see that only a very small amount of paint has been drawn into the chamber.

OLYMPUS DIGITAL CAMERASqueeze the top and bottom of the Paint Bellows together to make the chamber spritz out the paint. The effect will produce multiple miniature dots on the canvas.

OLYMPUS DIGITAL CAMERAContinue adding more spritzes of paint around the boughs of the tree. Focus on getting students to exercise their finger muscles while using the Paint Bellows.

OLYMPUS DIGITAL CAMERAContinue filling up that tree space until you are happy with how it looks. Concentrate more green in the spaces near the boughs, so that your artwork mimics the appearance of leaves throughout the tree.

OLYMPUS DIGITAL CAMERANow we are ready to decorate the tree. Squirt a bit of red finger paint into a bowl. Students can dip one finger into the red paint.

OLYMPUS DIGITAL CAMERAUse the tip of your finger to make little dots representing apples (or any type of fruit) on the tree.

OLYMPUS DIGITAL CAMERAContinue adding dots to emphasize concentrated finger placement. Students should pay attention to the overall balance and composition of their tree artwork, and focus on where placing the dots will make the tree look fuller.

OLYMPUS DIGITAL CAMERAWe’re all done!

You can experiment with different types of tree appearances or add more to your painting. However, the core purpose of the artwork is to engage fine motor skills and focus on process as well as result art.

Line-04

Thanks for checking out this post! Like us on FacebookShare this post with your friends, or Subscribe to this blog today to receive original craft project updates every Monday, Wednesday and Friday!

Craft Spotlight: Wild Weaving Mats

2014-07-07-FeatureImage

Weave wonderful animal mats using pre-cut printed strips. Create patterns while developing fine motor skills! 

The animal mats are made extra-large so you can hang the finished decorations up on a jungle-themed wall mural. They are pre-cut with slots to encourage weaving beginners to make interesting designs and learn concepts of going over and under.

R16001

These animals are ready to be decorated! Get the whole class in on the fun. Use craft feathers to glue to the birds or use metallic paint to add details to animals like the crocodile, fish or frog!

View more ideas at the PDF guide here. Watch the YouTube video below to see exactly how the mats are done.

Line-12Thanks for checking out this post! Like us on FacebookShare this post with your friends, or Subscribe to this blog today to receive original craft project updates every Monday, Wednesday and Friday!

Craft Spotlight: Fancy Stringing Rings

2014-05-19-FeatureImage

Make your jewelry fancy with Fancy Stringing Rings! Beautiful, bright colors and recognizable designs make these beads a joy to work with. String, sort, play and mix colors together on a light table! 

Beading is a prime fine motor skill activity that’s always a favorite for arts and crafts sessions! The best part about our Stringing Rings is that they are large enough to fit through any size string–even pipe cleaners.

There are a range of different activities you can do with the Fancy Stringing Rings. Stay tuned for this week’s original craft post featuring our Stringing Rings!

In the meantime, enjoy the video below showing how to make simple bracelets using Fancy Stringing Rings and tape! That’s all you need.

Simply lay your beads onto a strip of tape and seal up! It’s that easy!

2183

Line-20

Thanks for viewing this post! Like us on Facebook and subscribe to our blog today for updates every Monday, Wednesday and Friday! 

Tot School uses our Rubbing Plates!

FlowerPlateRubbings-5793-1Tot School made an assortment of rubbing plate prints using our R5804 Flowers Rubbing Plates! Check out Sweet Pea’s review on how well the prints turned out!


The post, called “Rubbing Plates” was published on July 23rd 2010 and can be viewed at this link.

Sweet Pea’s technique for using the rubbing plates is a great start for early learners with developing fine motor muscles. Using the non-dominant hand to hold the rubbing plate and paper in place, rub crayon across the surface of the paper with the dominant hand. This helps to reinforce muscle control and encourages patience and timing while making rubbing plate prints.

FlowerPlateRubbings-5798-1

And the flowers turned out lovely! Sweet Pea found that using block crayons helps to create an even image all throughout. If you are using regular crayons, be sure to use the side of the crayon rather than the point. The point will spread too much of the crayon over the paper and will blend the rubbing plate image in with the rest of the color.

Another important tip that Shannon wrote was that the images themselves could be used for botanical lessons: Use the provided identification sheet to connect the images to real existing flowers. Learn about flowers by name and match them to the rubbing plate images!

Thanks to Shannon for this post!

Images and original post © Tot School.

This post was not sponsored for a review. At LittleFingersBigArt, our mission is to present to our readers and viewers the newest and most creative craft ideas that fans of Roylco have made on their own. Our goal is to allow you and other educators and parents to reuse our products in fun ways so that children always get the best educational experience from them!

We’d love to see more ideas like this one! If you’ve got a brilliant craft idea or have made a version of one of our crafts that you would like to share with us, send an email to subscriber@roylco.ca with photos, descriptions or a link to your work. We will create a feature post and link back to you with full credit. We’d love to hear from you!