Mother Rising blog uses our Color Diffusing Leaves!

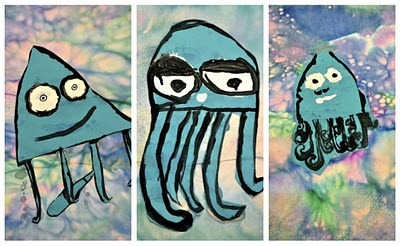
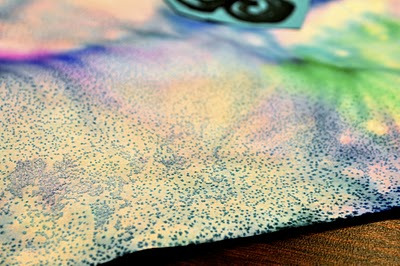
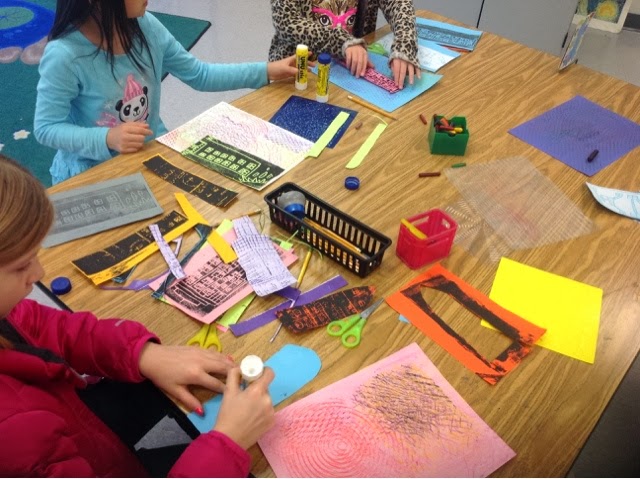
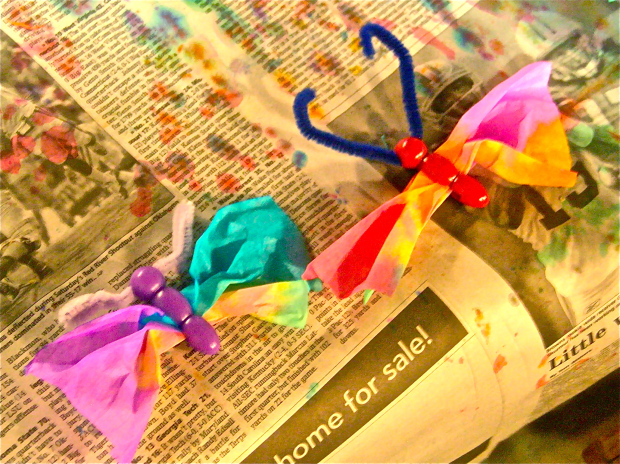
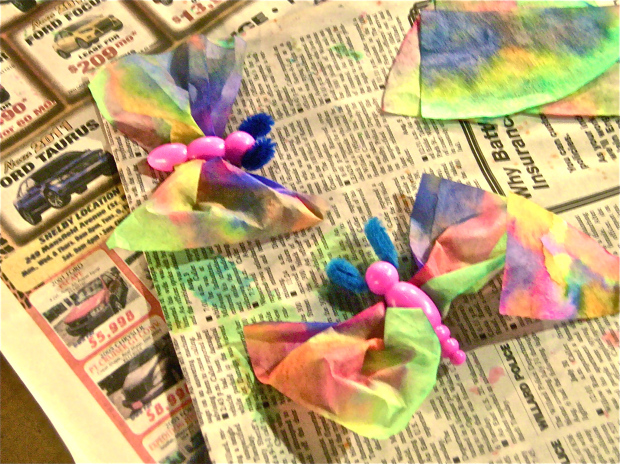
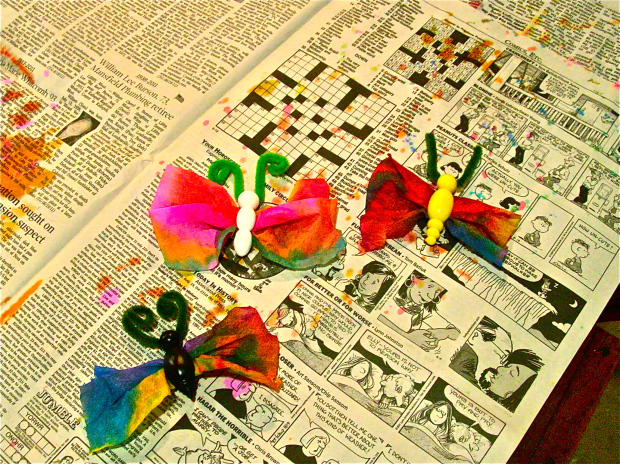
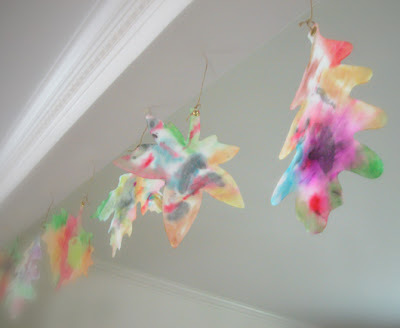
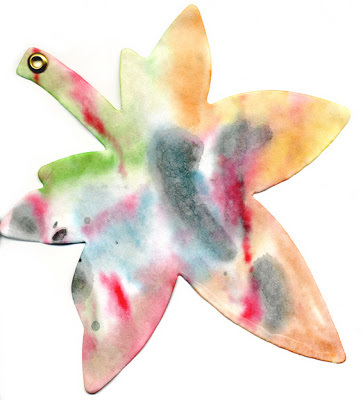
I absolutely adore the variety of designs that the Color Diffusing Leaves can be used to make. No two are alike–literally! This beautiful assortment of leaves were made from watercolor paint diffusion.

Wendy published this craft post on September 24, 2008. To read more about the post entitled, “Celebrating Autumn” click here!

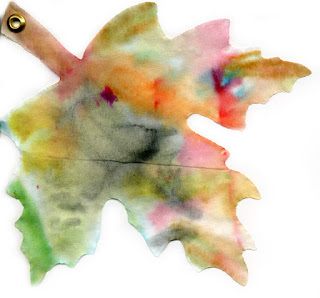
A neat addition to the colorful leaves is the grommet, with which Wendy attached in order to make it easier to hang the leaves from the ceiling. This is a great idea for making a garland too! Thread the leaves onto a length of string and hang the garland across a classroom wall.

Wendy also recommended trying crayon and colored pencil to produce a paint-resist effect. This would be a great technique to try out sometime!

Thanks to Wendy for this post!

Images and original post © Mother Rising

This post was not sponsored for a review. At LittleFingersBigArt, our mission is to present to our readers and viewers the newest and most creative craft ideas that fans of Roylco have made on their own. Our goal is to allow you and other educators and parents to reuse our products in fun ways so that children always get the best educational experience from them!

We’d love to see more ideas like this one! If you’ve got a brilliant craft idea or have made a version of one of our crafts that you would like to share with us, send an email to us with photos, descriptions or a link to your work. We will create a feature post and link back to you with full credit. Contact us through the contact form for more details. We’d love to hear from you!

The Differentiated Kindergarten blog uses our Manuscript Letter Beads!

Students will love being able to see their numbers and letters up close! These sturdy, colorful beads can be strung on thread or sorted into trays just like the photo above. Use the beads to teach number and letter recognition using visual and tactile approaches. Like blogger Marsha states, the beads aren’t simply beads, because “the bead IS the letter”! 

Blogger Marsha published her post on July 12, 2013. The post is entitled, “Beads Glorious Beads!!!” Check out the full blog post here!

As the post shows, the Manuscript Letter beads come in two formats: Lowercase and Uppercase.

To order our products, visit our website here or click on the following links to locate our products:

• Manuscript Letters (Uppercase)

• Manuscript Letters (Lowercase)

Number Beads

The Manuscript Letters can be used for a variety of projects or in educational lesson plans. Great for introducing letter and number recognition, the Manuscript Letters and Math Beads come in a variety of bright and fun colors that students will love to work with.

String up the letters to make bracelets or necklaces! Tie a knot in between each new threaded letter to keep them from bunching up, or use pony beads to separate the letters when spelling multiple words.

Use the letters for Bingo games! Play a variation of Bingo called Lingo (Letter + Bingo)! Draw a 4 x 4 square grid and write a random selection of letters on it. Distribute the graph cards among students and provide a handful of letters for the students to use. When a random letter is called out, students must search through their letter supply to find the correct letter. The first person to call out Bingo must have a row of 4 letters with corresponding letter beads!

One of Marsha’s activities involved separating a handful of letter beads into consonants and vowels or lowercase from uppercase. To really increase students’ letter comprehension, you can ask them to make words from the jumbled uppercase or lowercase letters!

Marsha even designed a lovely little cubby area to store all the letters inside. You can customize the storage area to hold letters as well as numbers or to differentiate between upper and lowercase letters.

Thanks to Marsha for this insightful post!

Images and original post © This Little Class of Mine

This post was not sponsored for a review. At LittleFingersBigArt, our mission is to present to our readers and viewers the newest and most creative craft ideas that fans of Roylco have made on their own. Our goal is to allow you and other educators and parents to reuse our products in fun ways so that children always get the best educational experience from them!

We’d love to see more ideas like this one! If you’ve got a brilliant craft idea or have made a version of one of our crafts that you would like to share with us, send an email to us with photos, descriptions or a link to your work. We will create a feature post and link back to you with full credit. Contact us through the contact form for more details. We’d love to hear from you!

Line-05

This Little Class of Mine uses our Color Diffusing Paper!

Used to make ocean backgrounds for these adorable squid characters, Color Diffusing Paper was combined with paint and bit of salt to create neat bubbly water effects!

This activity was part of a literacy/art class that studied a fun children’s book, I’m the Best Artist in the Ocean by Kevin Sherry. The squid on the front cover was used as the inspiration for this classroom’s art projects. Students also gained a lesson in biology as they learned a bit about ocean life and habitats of ocean creatures.

Check out some of the amazing art projects at this link!

The post, entitled “Best Artist in the Ocean: Giant Squid Painting” was published on September 27, 2010 at the Little Class of Mine blog. Visit more of this blog here!

Ms. Nellie Mae first showed her students a simple and challenging way to draw squid characters. The students painted their squid characters onto blue-color paper. While they waited for the paint to dry, the students prepared their backgrounds.

The R15212 Color Diffusing Paper was first placed on top of a sheet of white paper. This was a bonus trick that allowed students to make a copy of their artwork! Using liquid watercolors, the students painted their diffusion paper. The students then dropped pinches of salt onto the still-wet paint. This created a bubbly effect on the paint!

Crazy cool!

Thanks to Nellie Mae for sharing this post!

Images and original post © This Little Class of Mine

This post was not sponsored for a review. At LittleFingersBigArt, our mission is to present to our readers and viewers the newest and most creative craft ideas that fans of Roylco have made on their own. Our goal is to allow you and other educators and parents to reuse our products in fun ways so that children always get the best educational experience from them!

We’d love to see more ideas like this one! If you’ve got a brilliant craft idea or have made a version of one of our crafts that you would like to share with us, send an email to subscriber@roylco.ca with photos, descriptions or a link to your work. We will create a feature post and link back to you with full credit. We’d love to hear from you!

Ms. Johnston’s class makes our Tessellations!

Today we get to show off more Tessellations fun with art projects from Ms. Johnston’s class! 

This post, titled “Tessellations are so fun!” was published on May 9th, 2012 and was posted on Mrs. Johnston’s Blog: Adventures in Fifth Grade. Click here to visit the link!

Our R5863 Animal Tessellations are a hit in classrooms! These beautiful animal patterns can be combined to create repeated patterned shapes, known as tessellations.

Great for inter-subject learning! Combine math and art together to foster enjoyable learning for your students. Teach your students about mathematical tessellations using the guide provided.

View the complete R5863 Animal Tessellations PDF guide here!

Tracing the Tessellations designs are a great way to encourage critical thinking skills in patterning and symmetry designs. Tessellations are all about repeating patterns. First, trace the outline of your chosen design onto a sheet of paper.

R5863

Remove the design, then find common lines to re-position your template on. Trace a second design right beside the first using these common designs.

Later, once you are finished filling your sheet of paper with Tessellations designs, color the designs in!

5863_Tesselation_Animal

Thanks to Ms. Johnston for sharing her students’ work!

Images and original post © Mrs. Johnston’s Blog: Adventures in Fifth Grade

This post was not sponsored for a review. At LittleFingersBigArt, our mission is to present to our readers and viewers the newest and most creative craft ideas that fans of Roylco have made on their own. Our goal is to allow you and other educators and parents to reuse our products in fun ways so that children always get the best educational experience from them!

We’d love to see more ideas like this one! If you’ve got a brilliant craft idea or have made a version of one of our crafts that you would like to share with us, send an email to subscriber@roylco.ca with photos, descriptions or a link to your work. We will create a feature post and link back to you with full credit. We’d love to hear from you!

Line-21

Craft Spotlight: My Garden Stained Glass Frames

2014-03-31-FeatureImageBeautiful stained glass frames can be made by cutting out bits of 15257 Stained Glass Paper to fill in the gaps of the frame design. We got some great shots of the Art Campers hanging up the 52089 My Garden Stained Glass Frames in the garden!

_DSC0312

The My Garden Stained Glass Frames come in 8 designs. Your students can choose between a bee, spiderweb, dragonfly, butterfly and various flower designs! These Stained Glass Frames feature pre-punched holes, so you can hang your students’ finished frames from the ceiling in your classroom.

_DSC0309

First, trace the gaps of the stained glass frames onto a sheet of Stained Glass Paper. Cut a bit of a border around the outline. Spread some glue around the border and press onto the back of the stained glass frame.

_DSC0310


Be sure to change up the colors of the stained glass paper that you use. That way, the design will really stand out!

Line-16

Thanks for viewing this post! Subscribe today for updates every Monday, Wednesday and Friday on new product information, craft projects and guest post! Send us your comments or questions to subscriber@roylco.ca.

Drip Drip Splatter Splash uses our Color Diffusing Paper!

Create awesome effects on Color Diffusing Paper! The Drip, Drip, Splatter, Splash blog posted their butterfly artwork which used Color Diffusing Paper, permanent marker and watercolor paints.

The post was published on April 17, 2013 and is entitled, “Butterfly Art.” Click here to visit the page!

Using permanent marker helps to create definite lines that students can use as guidelines for painting. We suggest to first have your design sketched out onto scrap paper. Once you are satisfied with the look, place a sheet of Color Diffusing Paper on top. Trace the outlines with black marker onto the Color Diffusing Paper.

Watercolor paints work best with the Diffusing Paper as it gets absorbed into and throughout the paper. This neat effect is due to the process of diffusion. Diffusion happens when the particles in watercolors meet a material like diffusing paper that has little to no water content. As a result, it is always trying to fill in that area with watercolor particles.

The first part of the post shows a beautiful picture of the various butterfly renditions made with Color Diffusing Paper. Scroll further down the post to see other variations made with different materials!

Thanks to Shelly P for sharing her work!

Images and original post © Drip, Drip, Splatter Splash

This post was not sponsored for a review. At LittleFingersBigArt, our mission is to present to our readers and viewers the newest and most creative craft ideas that fans of Roylco have made on their own. Our goal is to allow you and other educators and parents to reuse our products in fun ways so that children always get the best educational experience from them!

We’d love to see more ideas like this one! If you’ve got a brilliant craft idea or have made a version of one of our crafts that you would like to share with us, send an email to subscriber@roylco.ca with photos, descriptions or a link to your work. We will create a feature post and link back to you with full credit. We’d love to hear from you!

Line-16

Mrs. Knight’s Smartest Artists use our Rubbing Plates!

Mrs. Knight’s Smartest Artists are truly showing their genius! Our textured rubbing plates were featured in a multi-step process to make these stunning cityscape projects! Learn more at the link!

These projects were inspired by James Gulliver Hancock’s goal in New York to illustrate all the buildings in the city. Taking his sketches, the students chose their favorites and illustrated them in sketchbooks. These drawings were later transferred onto foam stamp designs.

Mrs. Knight posted her students’ projects on January 10, 2014, entitled: “Cityscape Printmaking, 4th Grade.” Click on the title to visit the page.

After creating the prints, the students designed their backgrounds using construction paper, our rubbing plates and crayons.

The backgrounds were then placed behind the skyscraper prints. How inspiring! Visit their page to see more of the process.

Images and original post © Mrs. Knight’s Smartest Artists

This post was not sponsored for a review. At LittleFingersBigArt, our mission is to present to our readers and viewers the newest and most creative craft ideas that fans of Roylco have made on their own. Our goal is to allow you and other educators and parents to reuse our products in fun ways so that children always get the best educational experience from them!

We’d love to see more ideas like this one! If you’ve got a brilliant craft idea or have made a version of one of our crafts that you would like to share with us, send an email to subscriber@roylco.ca with photos, descriptions or a link to your work. We will create a feature post and link back to you with full credit. We’d love to hear from you!

Line-19

Butterfly Day at the Art Junction!

The amazing art community at the Art Junction made butterfly crafts using our R2450 Bug Bodies during one of their family days! See more of their brilliant artwork at the Art Junction blog

The Bug Bodies were combined with painted coffee filters to make the bug wings. Antennae were formed from pipe cleaners that were threaded through the top of the Bug Body heads.

The post was made on April 3, 2012 and is entitled: “Butterfly Day.” See the full post at the link provided!

The little artists used full sized coffee filters to explore the different effects of patterning colors and diffusion. The painted coffee filters were going to be used for the butterfly wings. While the artists were waiting for the coffee filters to dry, they explored another technique to create “butterfly” artwork: blotto painting! View the post to see more about their blotto painting strategies.

The coffee filters were cut in half and slipped through the slim opening in the side of the Bug Body. Once the Bug Body could be placed in the center of the folded coffee filter, the ends of the coffee filter were fanned out to produce a butterfly-wing effect.

Images and original post © Artmanews

This post was not sponsored for a review. At LittleFingersBigArt, our mission is to present to our readers and viewers the newest and most creative craft ideas that fans of Roylco have made on their own. Our goal is to allow you and other educators and parents to reuse our products in fun ways so that children always get the best educational experience from them!

We’d love to see more ideas like this one! If you’ve got a brilliant craft idea or have made a version of one of our crafts that you would like to share with us, send an email to subscriber@roylco.ca with photos, descriptions or a link to your work. We will create a feature post and link back to you with full credit. We’d love to hear from you!

Line-22

Thanks for stopping by to view this post!

Willard City Elementary Artists use our Tessellations Animal Templates!

The Artman posted his students’ math/art projects that used our Animal Template Tessellations! Tessellations are a great way to build coordination and patterning skills! See more about Artman’s process below.

Artman posted many photos of his students using our Animal Template Tessellations. A variety of designs from the pack were used. These included the elephant, lizard, fish, butterfly, dog, turtle and spider. The pack includes so much more, however! See the full display of designs at the full web guide HERE.

This project was posted by Artman at his WordPress blog Artmanews on April 30, 2012, entitled “Tessellations -part 1.” Visit the full post on his students’ tessellation art the link!

After the tessellations were traced onto paper, the students incorporated a lesson in color theory to complete their project. They chose complementary colors, which are two colors on the color wheel that are directly opposite each other. This student chose blue and orange as his complementary colors.

Instead of merely coloring in the tessellation in one flat color, the interior details were filled in with the complementary color to help distinguish the patterns from each other.

Lovely work!

Thanks to the Artmanews for this post!

Images and original post © Artmanews

This post was not sponsored for a review. At LittleFingersBigArt, our mission is to present to our readers and viewers the newest and most creative craft ideas that fans of Roylco have made on their own. Our goal is to allow you and other educators and parents to reuse our products in fun ways so that children always get the best educational experience from them!

We’d love to see more ideas like this one! If you’ve got a brilliant craft idea or have made a version of one of our crafts that you would like to share with us, send an email to subscriber@roylco.ca with photos, descriptions or a link to your work. We will create a feature post and link back to you with full credit. We’d love to hear from you!

Line-01