Flag Windsocks

Windsock Artwork made from Color Diffusing Paper

2014-05-25-FeatureImage Make brilliant designs on Color Diffusing Paper using clear glue! Incorporate windsocks into a national holiday craft or use to cheer on your favorite team.

Age: 5+

Duration: 20 minutes

Learning Objectives: Create product art with an emphasis on using fine motor skills. Trace designs onto paper or draw freehand using references. Encourage scissor skills development. Incorporate windsock designs with themes learnt through social studies subjects or in observation of upcoming national events. Talk about significance of wind patterns and weather changes.

You’ll Need:

R15212 Color Diffusing Paper 12 x 18″

• Watercolor paint

• Plastic paint trays

R54460 Squiggle Pipettes OR paintbrushes

• Scissors

• Hole punch

• Yarn

• Tape

• Clear glue (preferrably with applicator tip)

Line-03 This activity is perfect for making a take-home craft that kids will love. You can decide to have kids draw their flag designs freehand, or print out a large flag design in black and white line-art that kids can use as a template beneath their Color Diffusing Paper sheet. In this activity, I’ve used both techniques.

Click on any of the links below to skip to a portion of this tutorial:
1. Designing your windsock

2. Making streamers

3. Assembling your windsock

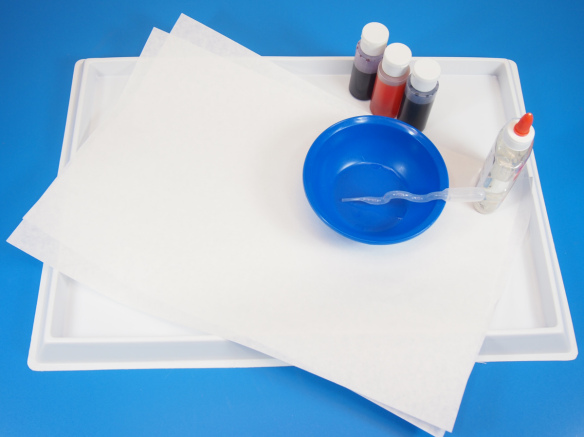
P6179636 Here, you can see all the materials I’ve assembled. Using bowls to contain the watercolor paint makes it easy for kids to keep their work-spaces clean. Pipettes are a great way to get children with developing finger muscles to experiment with different squeezing techniques.

Alternatively, use paintbrushes to apply the watercolor to the Color Diffusing sheets.
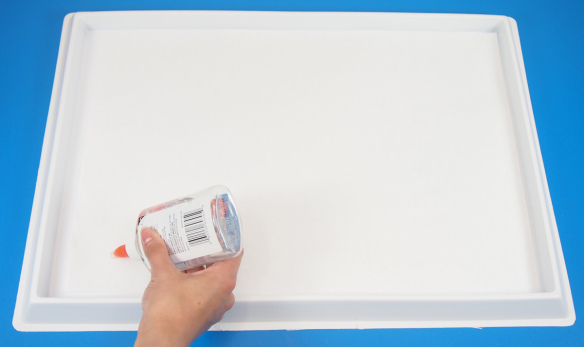
P6179640 First, decide on your design. If you decide to get students to freehand the design, it’s a good idea to print out a reference for students to look at. They can lightly pencil in their design if they’d prefer, then go over top of the design with the clear glue.

It’s ideal if the clear glue dispenser has a pointed applicator that kids can use like the point of a marker or pencil. Gently press the glue down onto the Color Diffusing Paper on top of your penciled design.
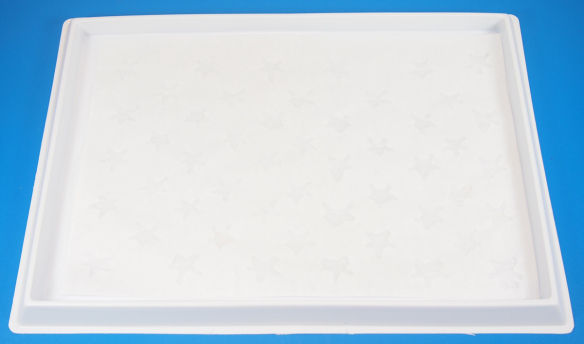
P6179642The photo above won’t clearly show the image, but I’ve “drawn” 50 stars with the clear glue in a stacked sequence. Can you guess the flag I’m making?
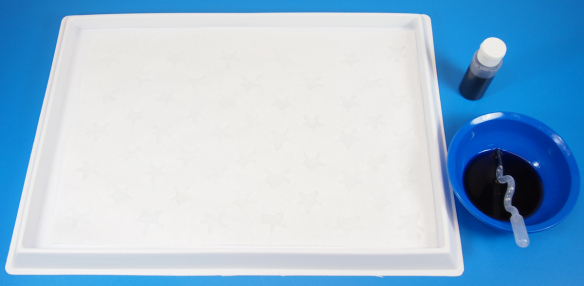
P6179644Wait until the glue is completely dry! This usually doesn’t take too long, but if you are worried about time, be sure to do the glue “drawing” on a day before your painting class. You can speed up by the process by leaving the drying artwork under an oscillating fan. Once you are ready to paint, place the Color Diffusing Paper into a plastic paint tray.

For this particular project, I’ve grabbed blue watercolor. Notice how nicely the Squiggle Pipette fits into the colorful paint bowl. You can place the bowl in the center of a group of students and have them all grab their paint from that one location.
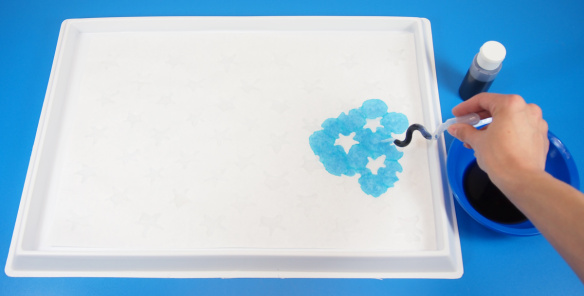
P6179664This is my favorite part!! As I release the blue watercolor paint from the Squiggle Pipette, the paint carefully avoids any place where I’ve “drawn” in the glue. This is because the glue has seeped completely through the paper and acts as a barrier to the oncoming ink.
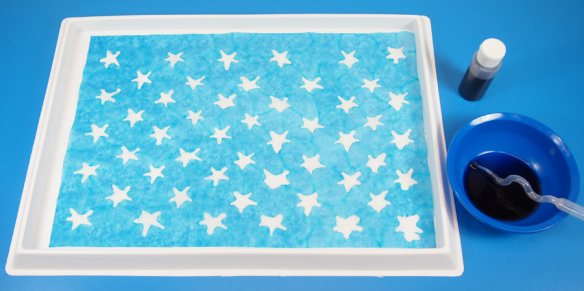
P6179668It will take a few squirts from the Squiggle Pipettes to fill the entire canvas, but it’s well worth it for the colorful effect and design popping through!
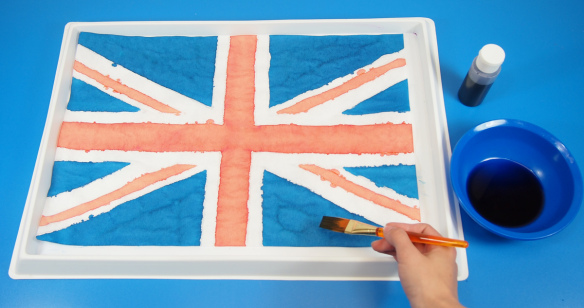
P6179671For a project like the Union Jack flag, I placed a line-art print of the flag design beneath the Color Diffusing Paper and traced out all the lines with the clear glue. Once the glue was dry, I used a paintbrush to apply the paint. This helped maintain an even layer of paint throughout the design.
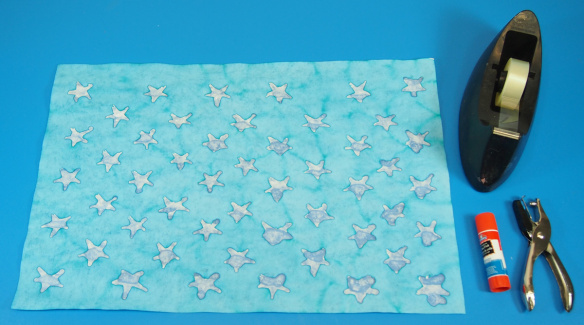
P6179714 Take your main windsock design and prepare it for lift-off!
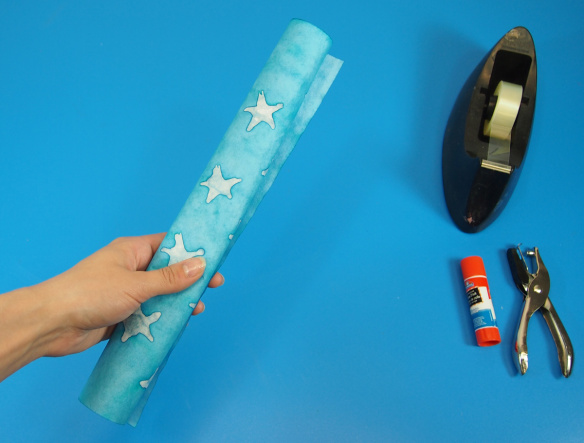
P6179717First, roll the windsock into a tight tube. This will help it retain a cylinder shape once you string it up.
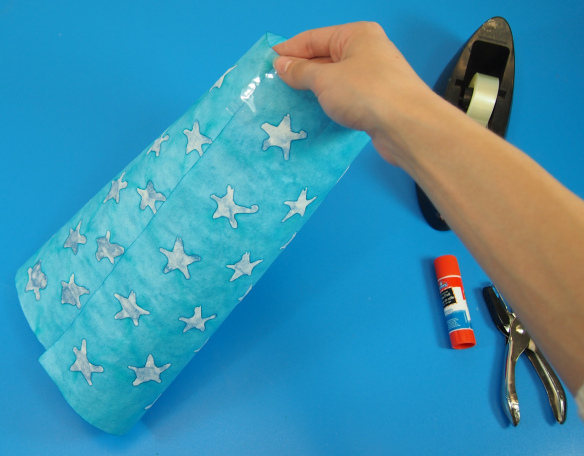
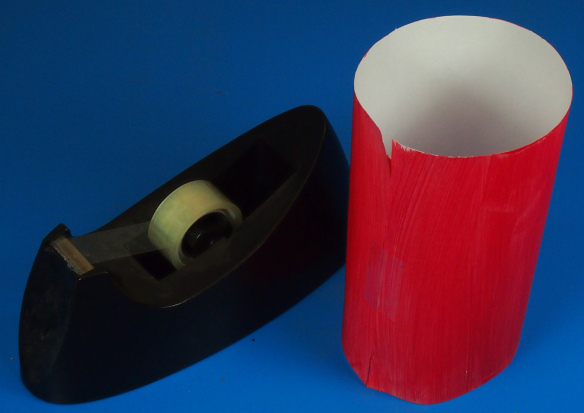
P6179719 Unwind the tube until the ends are overlapping by 2″ on both sides. Tape the edges together.
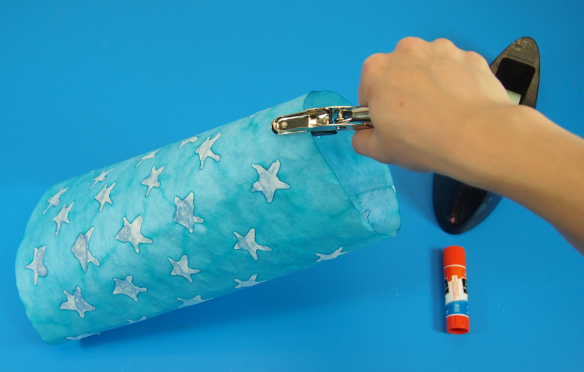
P6179724 Next, make four holes at equal intervals along the top edge of your flag windsock.
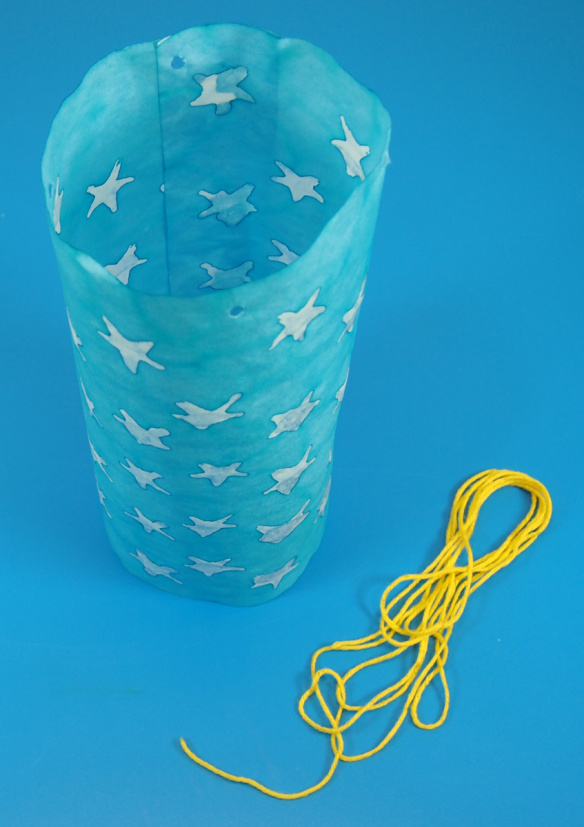
P6179726Grab a large run of yarn, about 2 yards (1.8 m) in length.
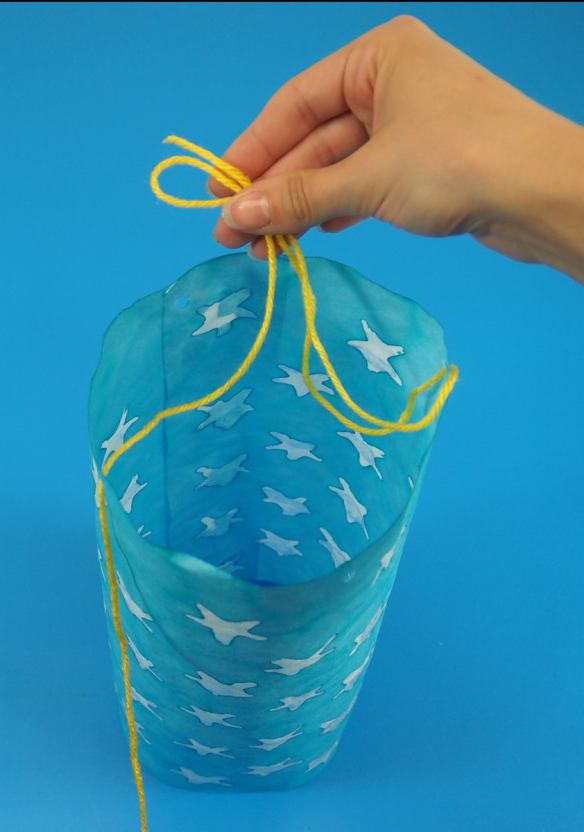
P6179729 Loop one end through a hole and hold. Make a second loop with the other end of the yarn and hold that along with the first strand. Use the remaining yarn to pass through a second hole.
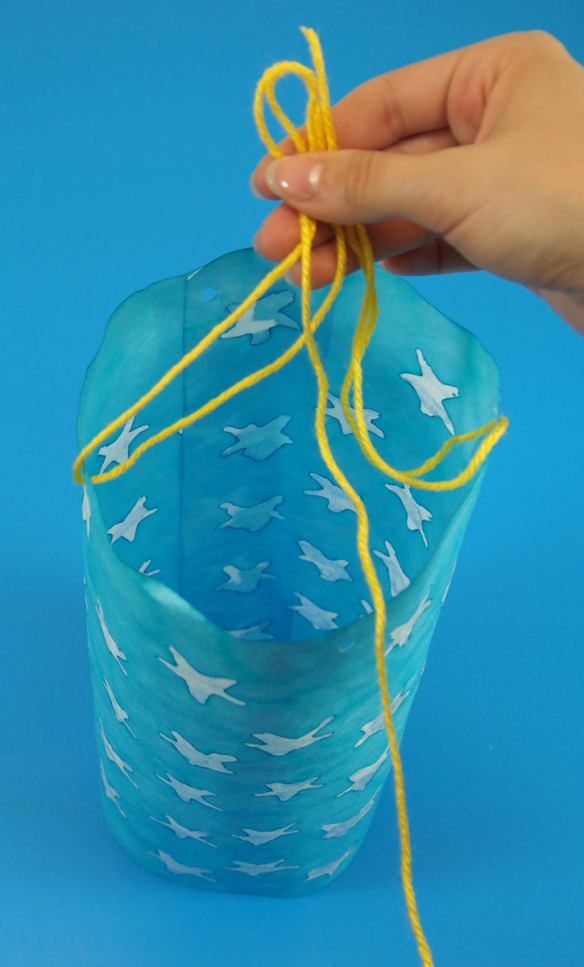
P6179731Loop back up and hold the loop in your hand along with the rest of the previous loops. Pass the end of the yarn through a third hole.
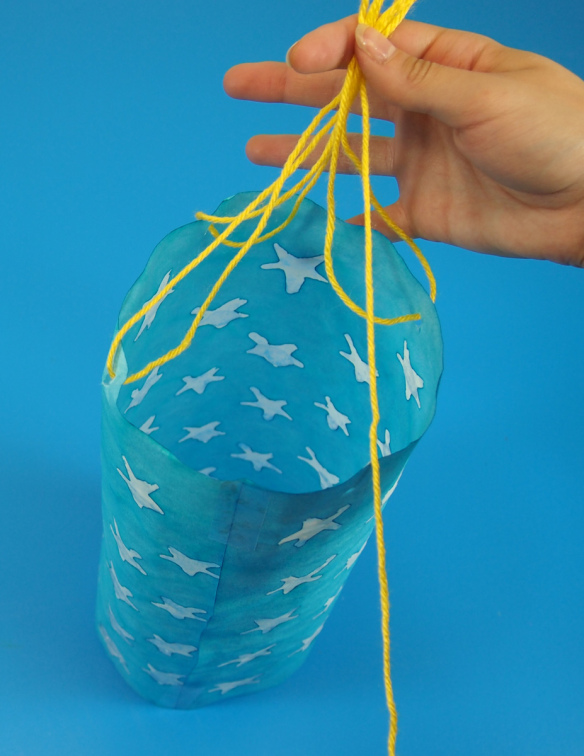
P6179732Loop back up through the hole and hold the loop in your hand with the rest. Thread the final stretch of yarn through the fourth hole.
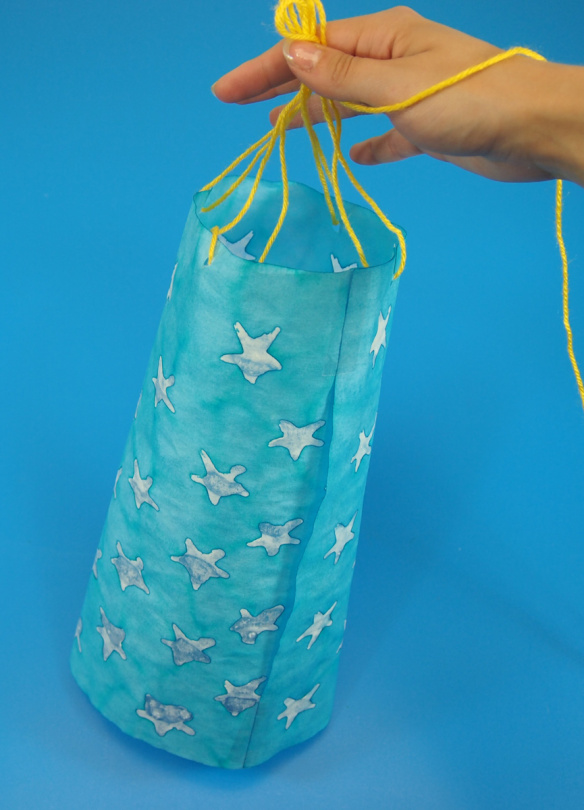
P6179734Then loop back up and hold this loop in your hand with the remaining loops. There should be some leftover length of yarn to use as the string from which you’ll hang the windsock. Twist all the loops together, as one, into a tight knot.
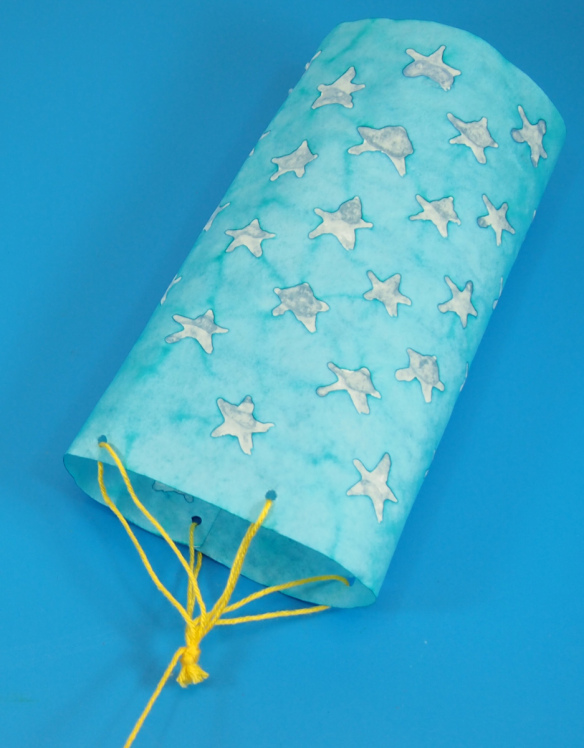
P6179737You can trim some of the excess loops above the knot part. Just make sure not to snip the long piece of string! The first part of the windsock should look something like this.  
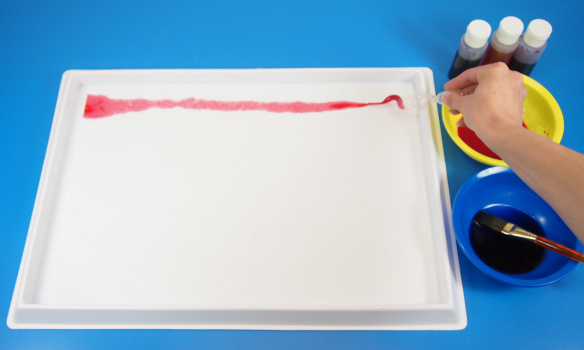
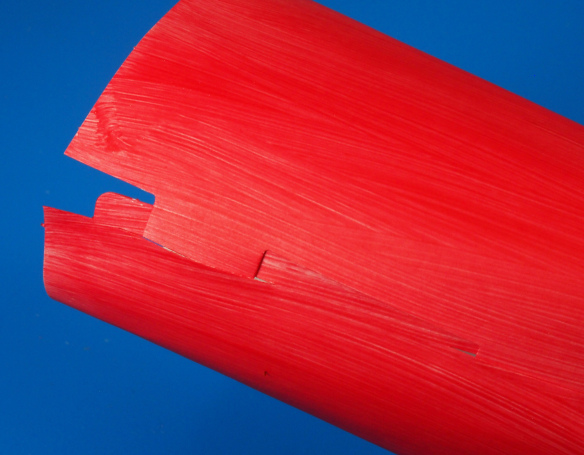
P6179681 Now it’s time to make the streaming ends for the windsocks. Place the Color Diffusing paper lengthwise, then spread the paint any which way you’d like. Make lines, spots, color entire strips of paper or intertwine the colors together.
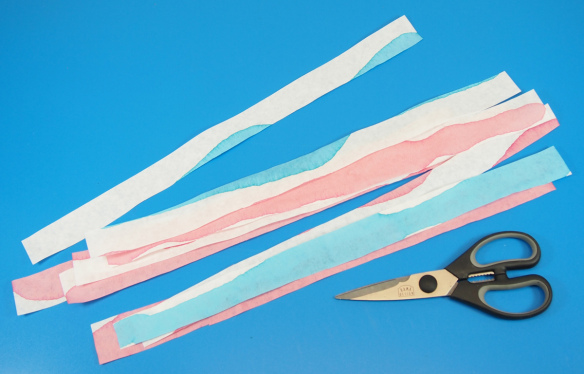
P6179712When this particular sheet of paper has dried, cut it into strips lengthwise.
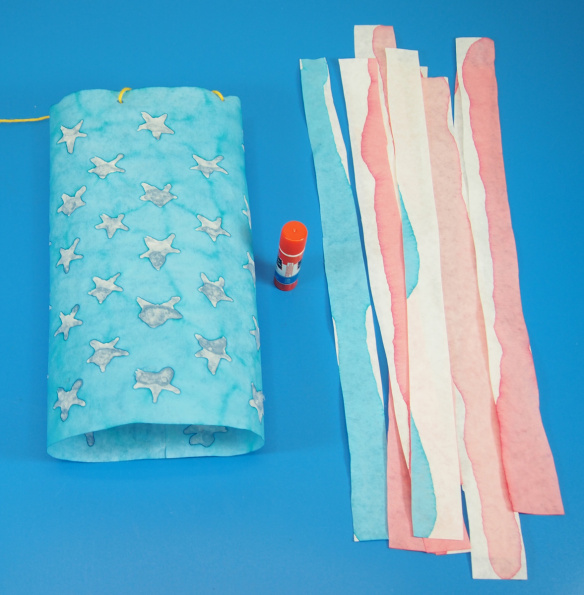
P6179747 Now grab some glue! We’re ready to attach the final portion of the windsock.
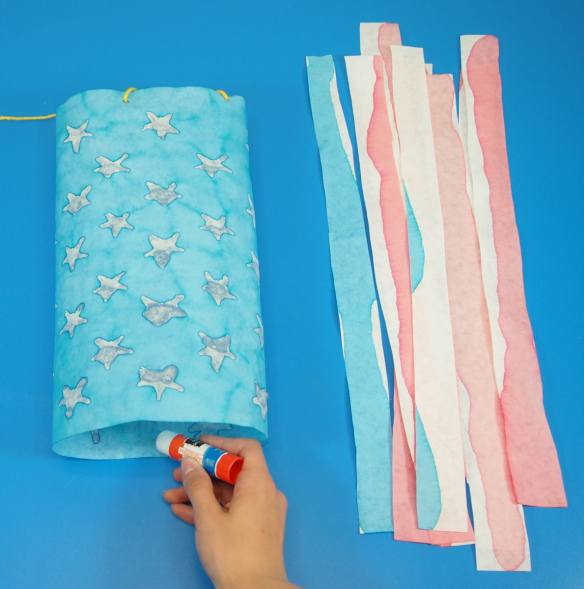
P6179748Put a bit of glue on the inside of the windsock’s bottom edge.
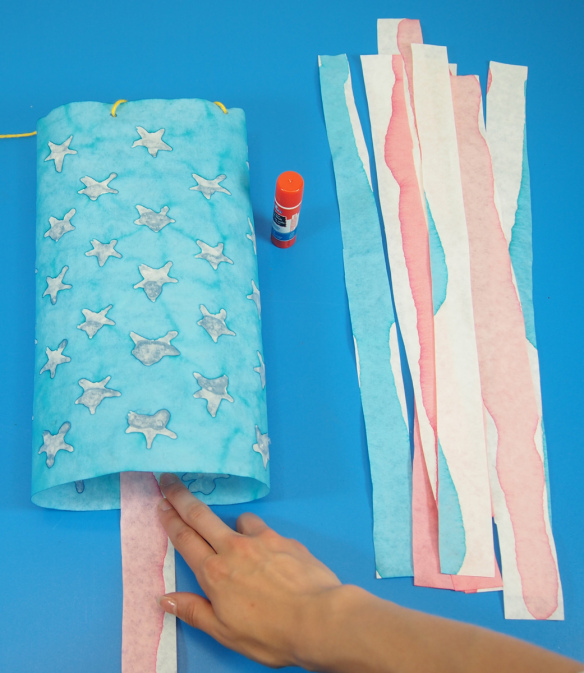
P6179749Press a streamer down onto the glued portion. Space out your streamers into equal intervals and continue all the way around the bottom of the windsock.
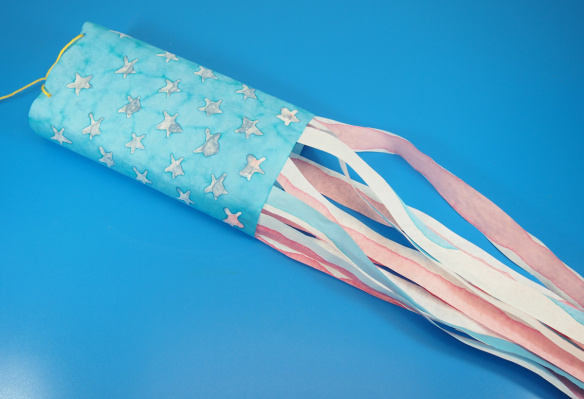
P6179752Here’s a look at our windsock! Isn’t it a beaut!
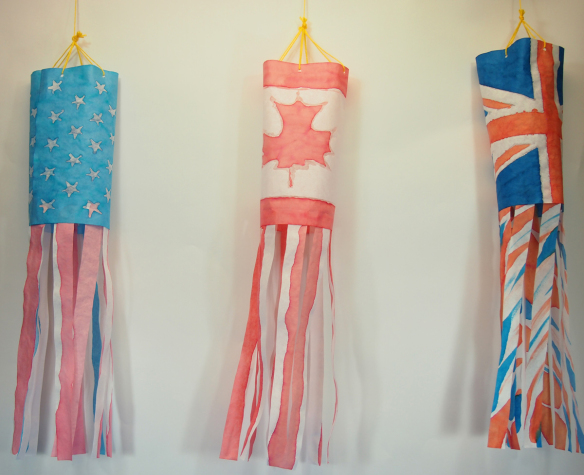
P6179757 You can see further completed designs here, including the American flag, Canadian flag, and the Union Jack!
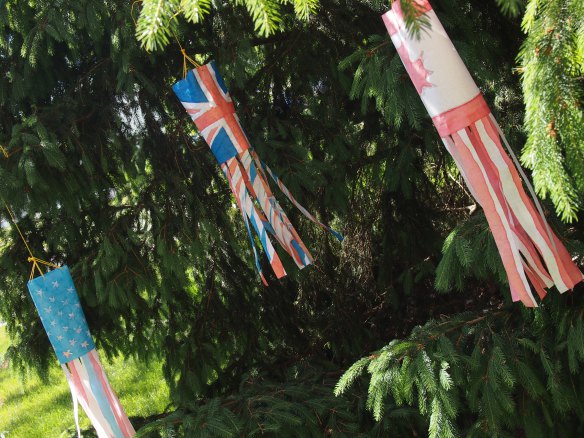
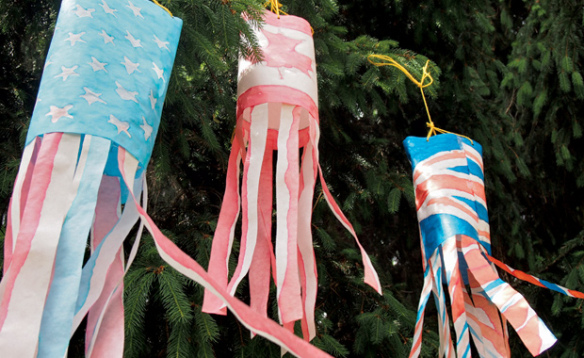
OLYMPUS DIGITAL CAMERA Here’s a shot of our windsocks fluttering outside from our local pine trees!
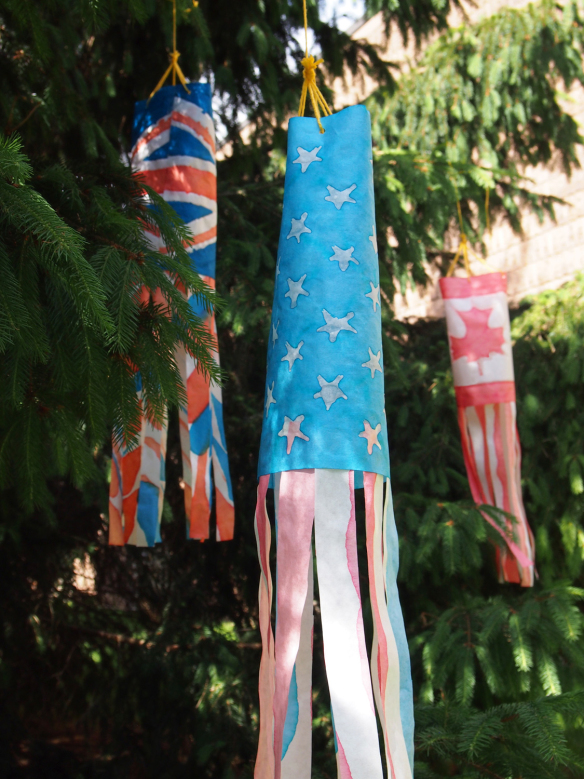
P6209823 Another gorgeous look at our lovely flag designs! Watch how they flutter animatedly in the breeze! Line-03 Thanks for checking out this post! Like us on FacebookShare this post with your friends, or Subscribe to this blog today to receive original craft project updates every Monday, Wednesday and Friday!

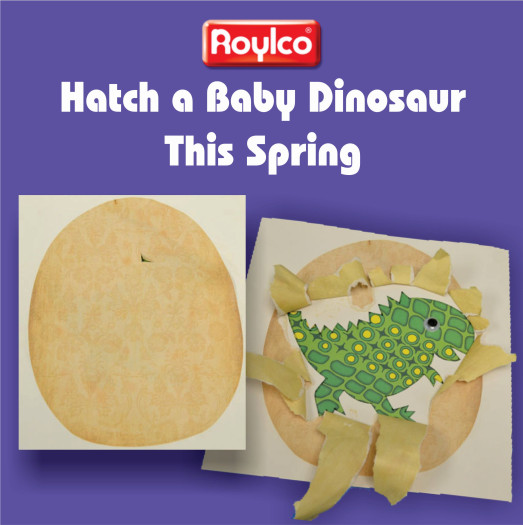
Hatch a Baby Dinosaur This Spring

Roylco baby dinosaur lesson plan

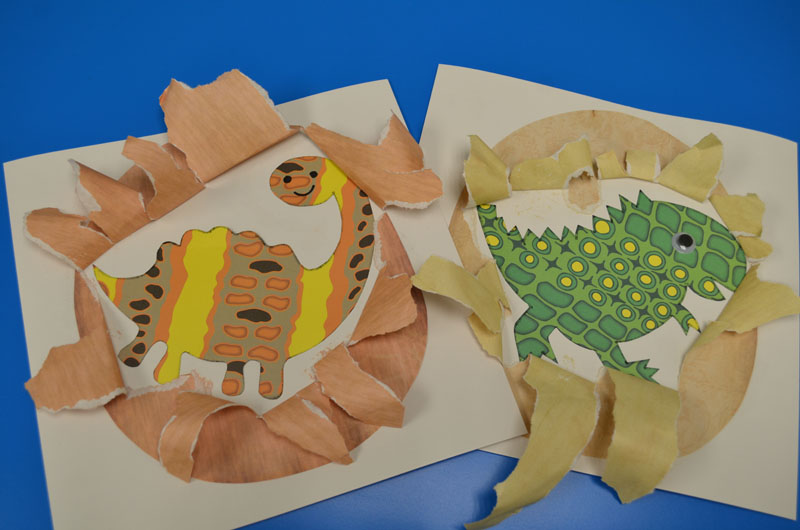
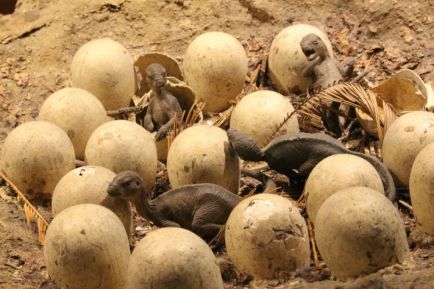
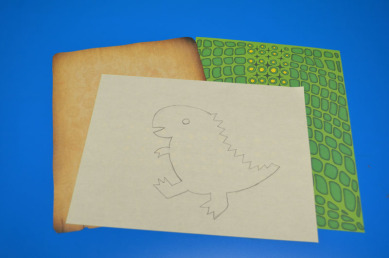
Most young children are fascinated by dinosaurs. They are curious about these mighty creatures that lived millions of years ago. Where did the dinosaur come from? Today we are going to introduce a hatching baby dinosaurs craft activity that children will love. This is a great class activity when you are teaching about dinosaurs.  You can also introduce it at the end of the dinosaur discovery tour at the museum.  Use this activity to talk about how a baby dinosaur grows inside the egg. Children will love to help the baby dinosaur hatch from the egg.

Age: 5+

Duration: 10 – 15 minutes

Learning Outcomes:  Learning evolutionary concepts. Practice drawing skills. Exercise Fine motor skills. Growing children’s interest in science.

You’ll Need:

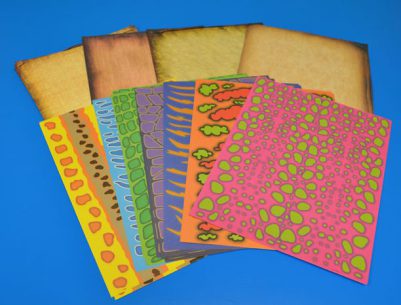
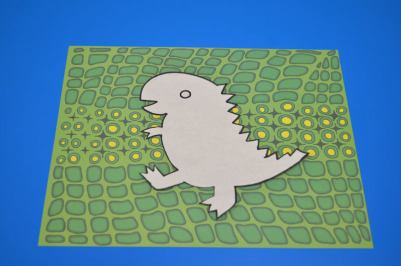
Let the children choose one piece of paper with their favorite colors and patterns (R15311 Dinosaur Print Papers).

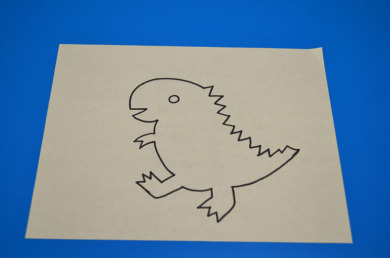
Encourage children to use a pencil to draw the baby dinosaurs at the back of the dinosaur print paper. After they draw the baby dinosaur, they can use the black marker to trace it.

Then cut out the baby dinosaur.

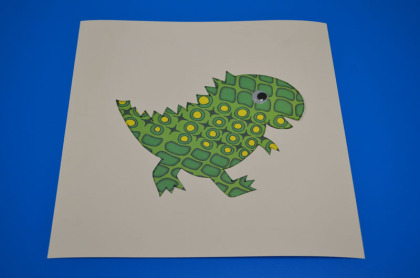
Glue the dinosaur on the white craft paper. You can glue the eye or draw the eye on the dinosaur.

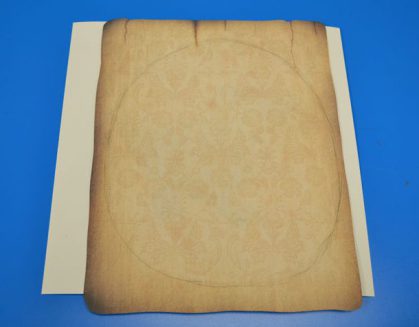
Choose a piece of antique paper ( R15286 Antique Paperthat you like and lay it on top of the baby dinosaur. Use a pencil to draw an egg outline and cut it out.

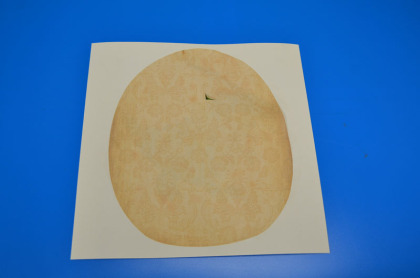
Add glue to the outline of the brown egg and place it on the white craft paper over top of the baby dinosaur. Make a small cut in the middle the egg.

Ask the children to write their names on the white craft paper and exchange their crafts.

Here comes the exciting moment of this activity.

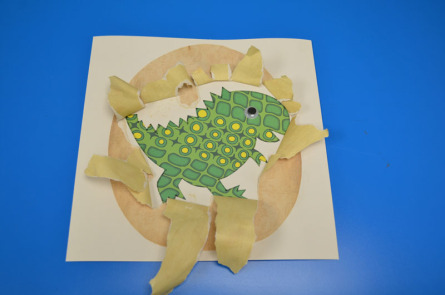
Invite children to help the dinosaur hatch from the egg by tearing open the paper (where you have made the small hole) to reveal the baby dinosaur inside the egg!

It’s a lot of fun for children to discover the different types of baby dinosaurs.

Please visit https://roylco.com/shop/r15311-dinosaur-print-papers/ for more information.

Bundle Savings

Get all the Roylco items used
in this project and save 15%!

$14.52 USD
bundled price
Add Bundle
to Cart

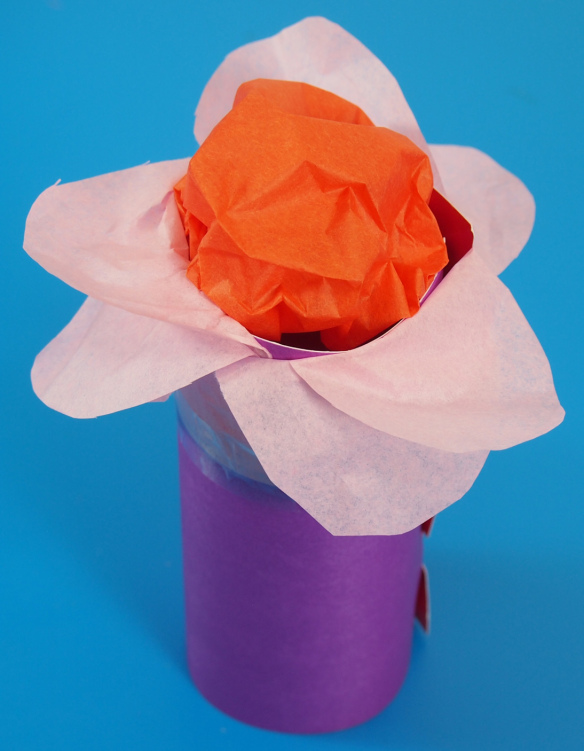
Tube Craft Flower

Tube Craft Flowers

tube crafts flowers

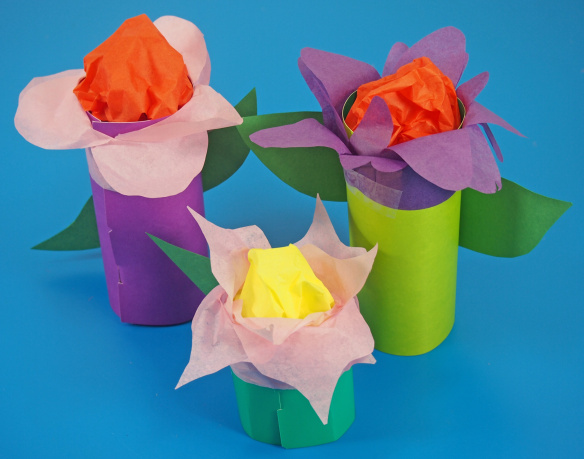
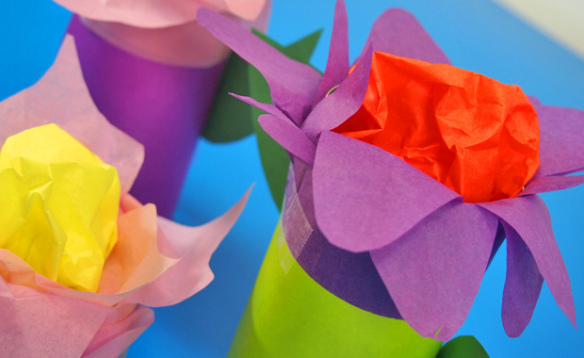
Using simple materials such as tube rolls and tissue paper, you can make the most intriguing flower decorations for your spring display! Try it with our R39301 Tube Crafts!

Age: 5+

Duration: 5-10 minutes

Learning Objectives: Use scissor skills to create beautiful flower decorations. Develop fine motor skills through rolling and securing the tubes. Create a lovely decorative addition to your spring/summer art display.

tube crafts flowers

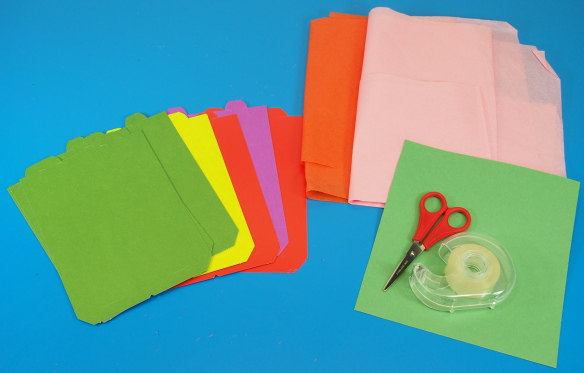
You’ll Need:

R39301 Tube Crafts

• Scissors

• Tissue paper

• Tape

• Construction paper

• Pencil

Line-18

tube crafts flowers

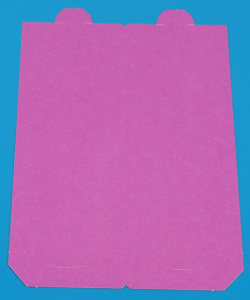
Choose one of the flat Tube Crafts. The tubes have colors on both sides so you can roll it according to the side you want.

tube crafts flowers

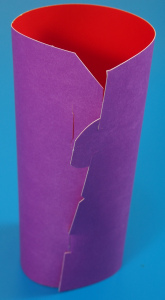
Gently roll the card into a tube shape and secure with the specially designed notches and tabs. This tube will form the base of the flower.

tube crafts flowers

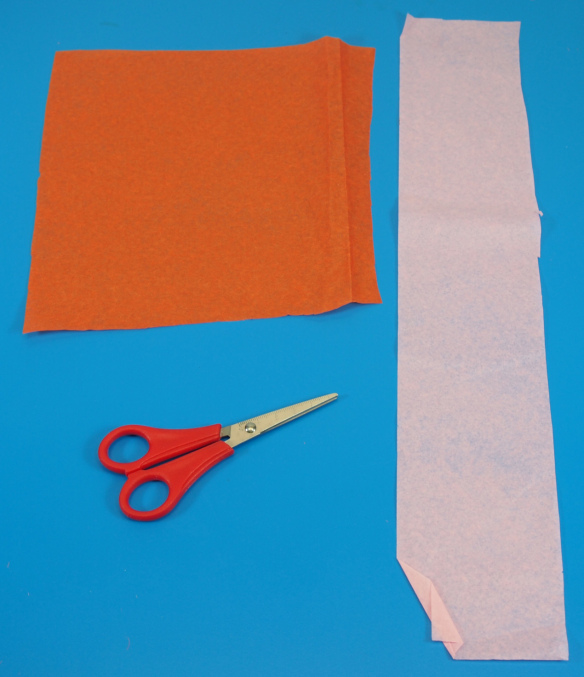
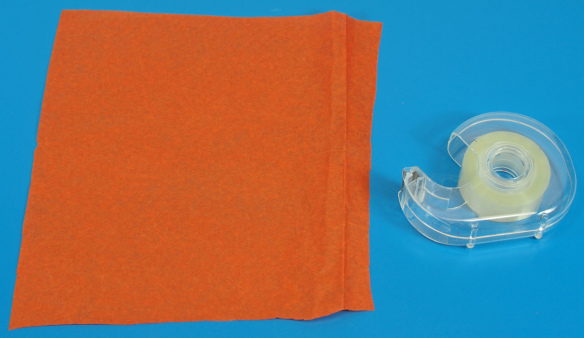
Next, cut a long strip of tissue paper from your sheet. If you have smaller lengths of tissue, you can simply tape them together. The strip should be about 3 x 16″ wide.

tube crafts flowers

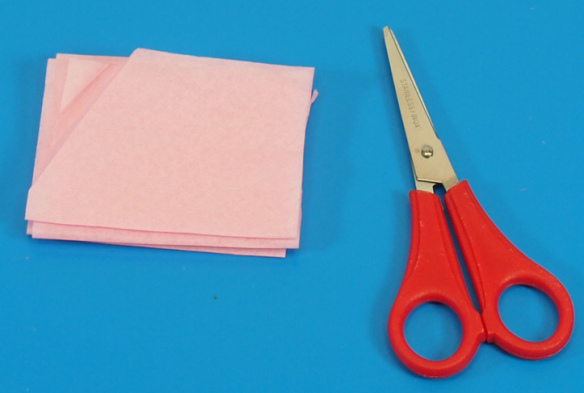
Accordion fold the strip of paper until it is all neatly tucked into a square.

tube crafts flowers

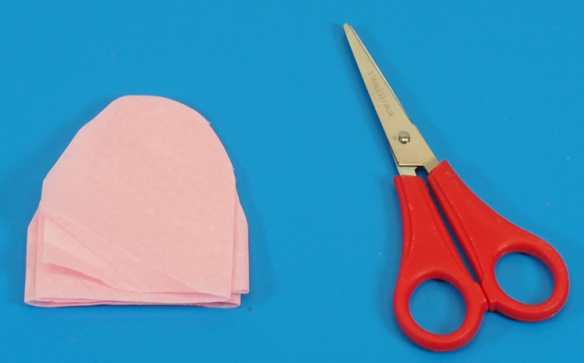
Cut the unfolded edge into a half circle shape, making sure to keep the side folds intact.

tube crafts flowers

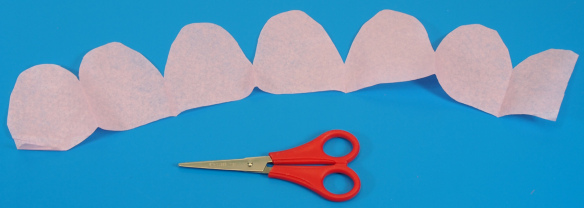
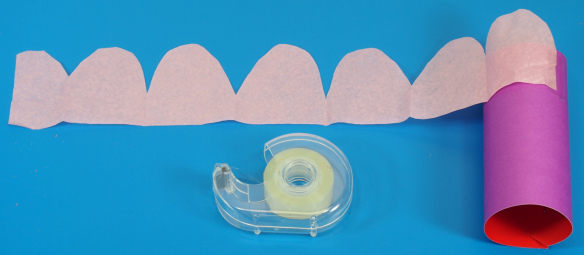
Unfold the chain to reveal a petal-like design.

tube crafts flowers

Gather up the tissue paper that you will use to form the center of the flower.

tube crafts flowers

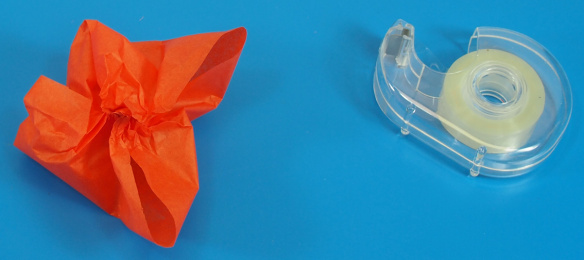
Scrunch all four corners together in the center and secure with a piece of tape.

tube crafts flowers

Tape one edge of the petal chain onto the top of your Tube Craft and roll it all the way around the tube edge.

tube crafts flowers

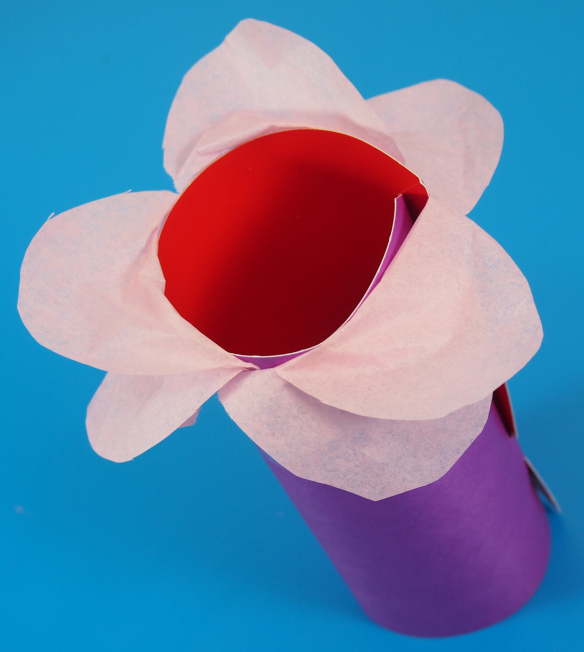
Once the tube is completely rolled with the tissue paper, fold the petals outward.

tube crafts flowers

Stuff the center of the flower inside the tube and secure with tape.

tube crafts flowers

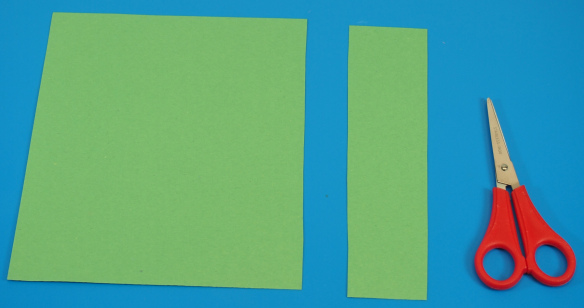
Cut a strip of paper from the construction paper sheet.

tube crafts flowers

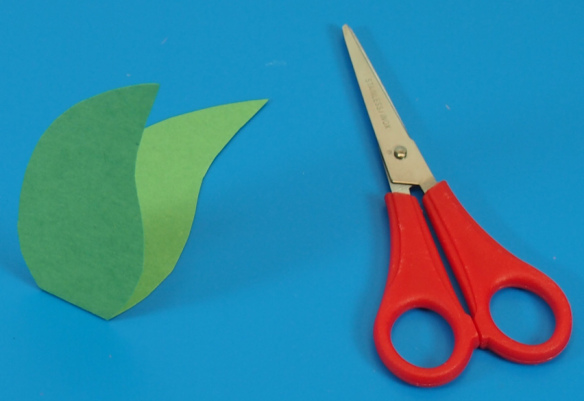
Fold the strip of construction paper in half and cut from the fold line to make a leaf shape. Unfold the sheet of construction paper.

tube crafts flowers

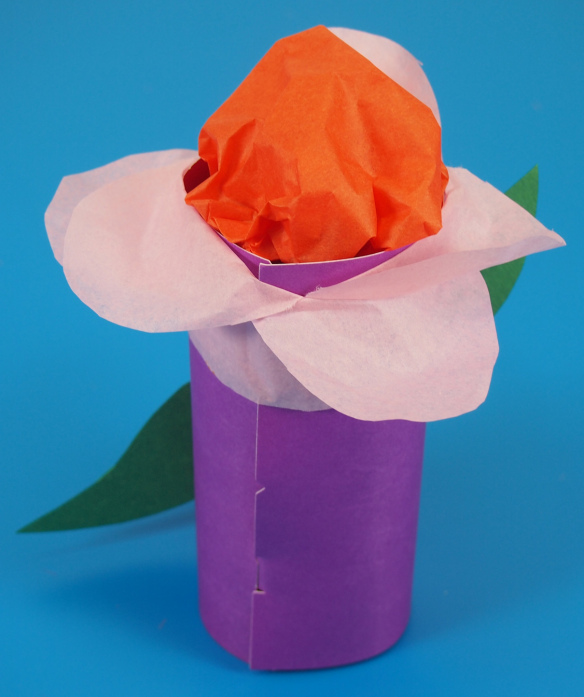
Tape the leaf shape to the back of the tube to finalize the flower.

tube crafts flowers

With these techniques, you can make a full garden of flowers!

Line-22

Like us on FacebookShare this post with your friends, or Subscribe to this blog today to receive original craft project updates every Monday, Wednesday and Thursday!
Chinese Lanterns

Color-In Chinese Lanterns Craft

2014-02-12-FeatureImage

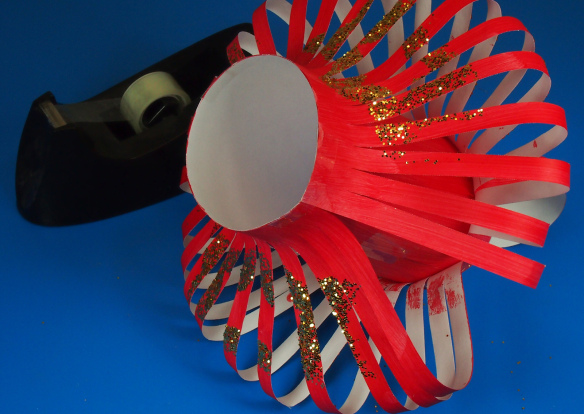
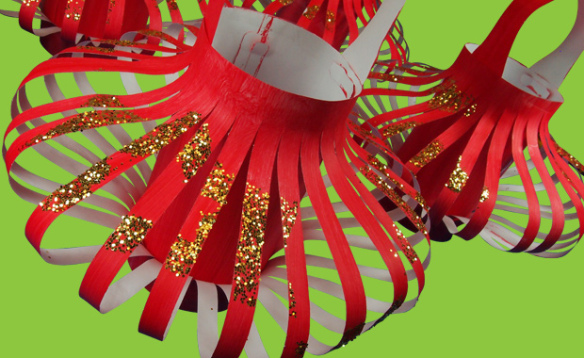
Get ready for Chinese New Year!  Learn how to create lanterns can help students work with form and color to create these awesome, decorative projects. We’ll show you the step by step process using our R22021 Color-In Chinese Lanterns and our R55009 Shape Sponges!

Age: 5+

Duration: 20 minutes

You’ll Need:

• R22021 Color-In Chinese Lanterns

• R55009 Shape Sponges

• Paint

• Glue

• Glitter (if desired)

• Paint tray

• Paint bowl

• Paint brush

• String

• Tape

Line-18

2014-02-12-Step01

It’s a good idea to use newspapers to contain glitter!

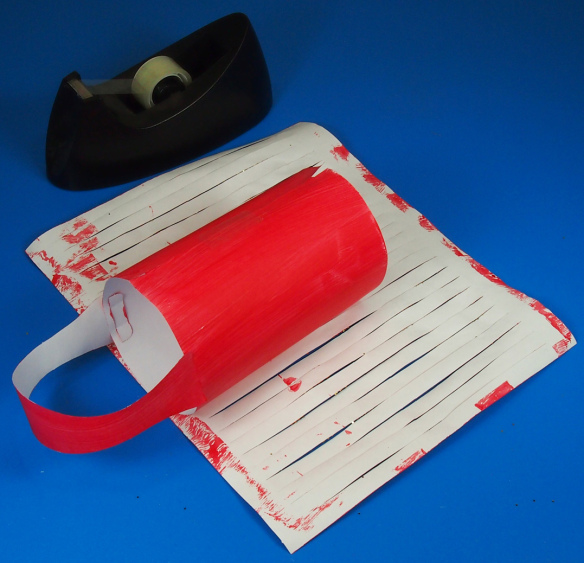
Each of the Chinese Lantern projects comes with 3 pieces: a large square with lines cut into it, a medium rectangle and a wavy-looking long piece.

2014-02-12-Step03Set each piece inside your paint tray. Paint all 3 pieces in a flat color. If needed, paint on two or three layers. When you are satisfied with the strength of the paint color, set aside to dry.

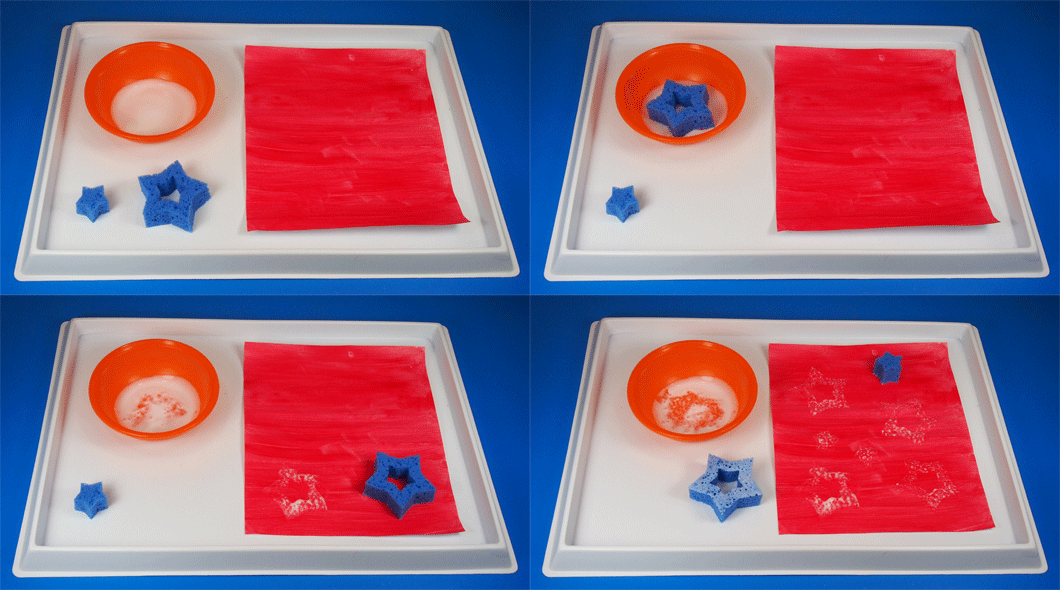
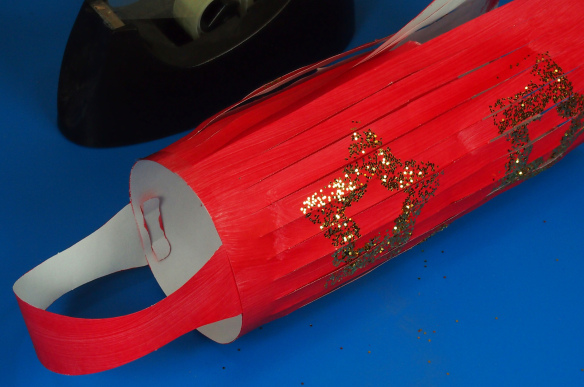
2014-02-05-Sponge-AnimationOnce the large square piece is completely dry, get ready to decorate it! Fill a plastic bowl with a bit of white glue. Select a favorite sponge shape and dip one side into the glue. Carefully stamp the sponge shape 4-6 times across the square lantern piece.

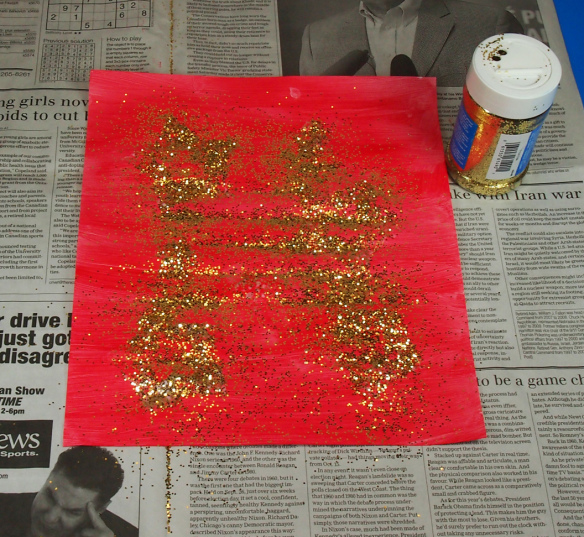
2014-02-12-Step05Make sure you do this step quickly, before the glue dries! Place the square piece onto newspaper. Sprinkle gold glitter glue completely on top of the stamped glue areas.

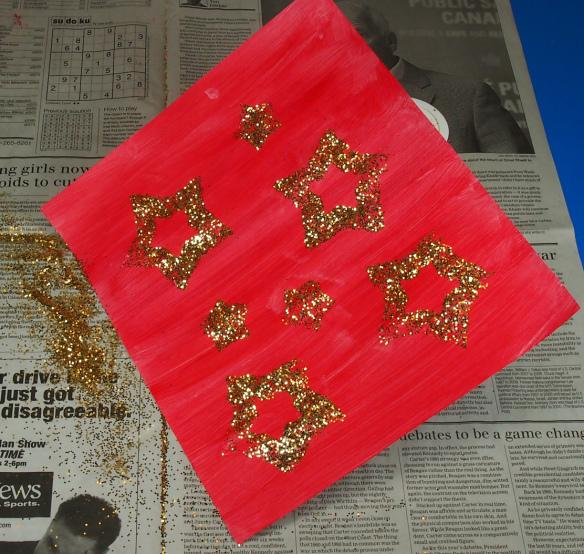
2014-02-12-Step06When the glue and glitter have dried, gently lift up one edge of the square piece and shake off the excess. Only the parts where the glitter met the glue will remain on the square piece. This creates a lovely surprise for students! Tip: Try to separate the die-cut lines if they are stuck together from the paint/glue.

2014-02-12-Step09

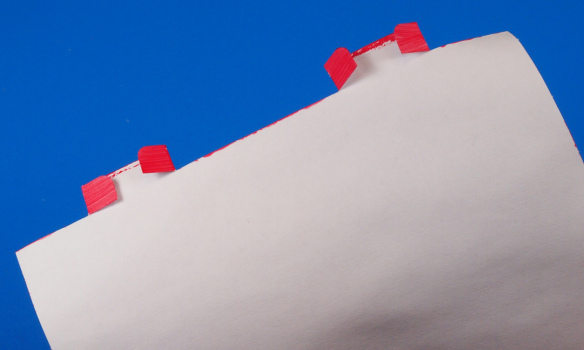
Now it’s time to switch back to the medium rectangle piece. There are two tabs at the top and of the rectangle piece. On the bottom are two slots. Flip over the piece and locate the tabs. Grab the sides of the tabs and fold them into the center.

2014-02-12-Step10Roll the rectangle piece into a tube. To secure the tube, slide the folded tabs into the slots.

2014-02-12-Step11Reach inside the tube and unfold the tabs to “lock” in place.

2014-02-12-Step12You can reinforce the tube with a bit of tape!

2014-02-12-Step13Now it’s time to attach the handle. That’s what the long wavy piece is for! Locate the two slots along the top edge of the tube and slide the ends of the handle through.

2014-02-12-Step14

This will create a little basket-like project. Lay your glitter-stamped square piece face down so that the unpainted side is facing up. Align the top edge of the basket tube with the top edge of the square piece.

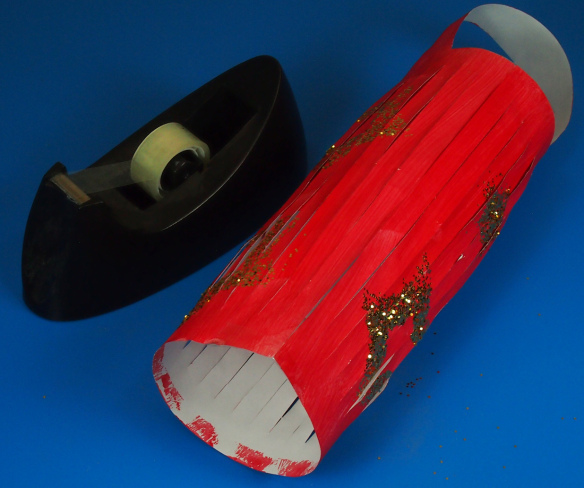
2014-02-12-Step15Wrap the glitter-stamped piece all around the tube and secure the edges together with tape.

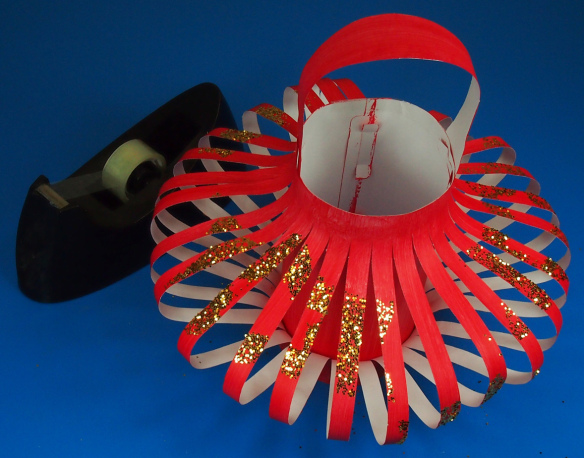
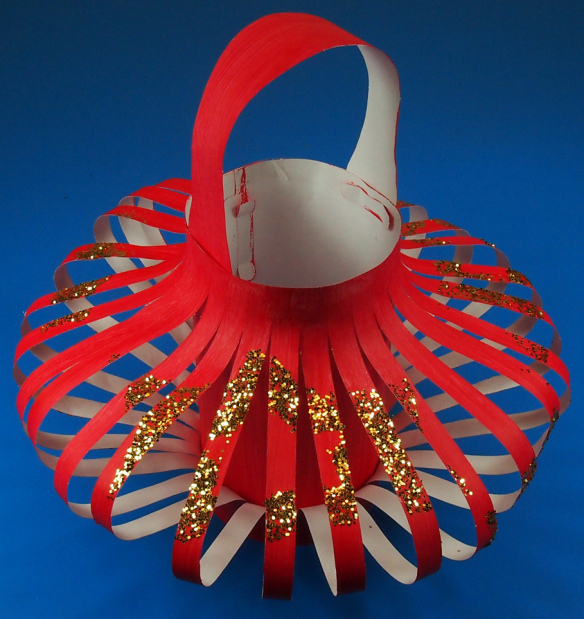
2014-02-12-Step16Now, flip the lantern over. To create the bowl effect, you need to match the bottom edge of the square piece with the bottom edge of the inner tube. This will cause the strips to fan out.

2014-02-12-Step17Tape the bottom edges together.

2014-02-12-Step18If needed, separate and fan out the individual strips.

2014-02-12-Step19A beautiful, glittery take-home gift or, use string to hang the lanterns together from the classroom ceiling.

Line-18

Thanks for stopping by to view this post! If you would like to share some of your or your students’ projects, send photos of your work to subscriber@roylco.ca! Thanks for visiting and check back soon!

Overlapping Stencil Shapes

Overlapping Stencils

Feature-Image-stencilcolouroverlapBlend basic shapes and create a colorful collage art piece! Great for rainy day art projects.Young children will love tracing out the fun shapes. The stencils are easy to manipulate and perfectly-sized for small fingers to handle. Build fine motor skills while combining colors and shapes for interesting effects!

Age: 3-5

Duration: 15-20 minutes

You’ll Need:

R58620 Fine Motor Skills Silly Stencils

• Markers or crayons

• Paper

• Pencils

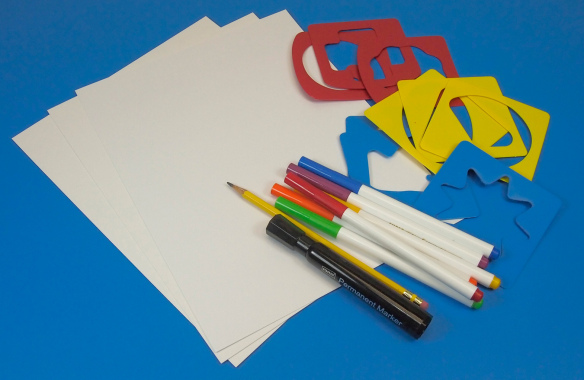
Line-10Each of the stencils feature a shape that can be popped out, resulting in one stencil and one template. Two students can work at a time using the same shape. There are 27 stencils and 27 templates in total, which gives you the most value for your students’ art!

_5272126Set out all your materials. Each of the stencils are color-coded: The yellow stencils all contain basic shapes such as squares, triangles, trapezoids, hexagons, circles and so on. You can discuss the different shapes with your students and ask them to describe the other shapes they see in the pack.

The red stencils feature slightly more difficult shapes. These shapes are recognizable shapes like hearts, swirls, stars, clovers and more!

The blue stencils are the most challenging shapes to trace out. Use these shapes for more complex drawings.

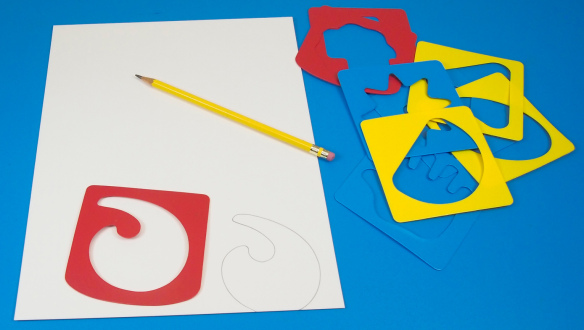
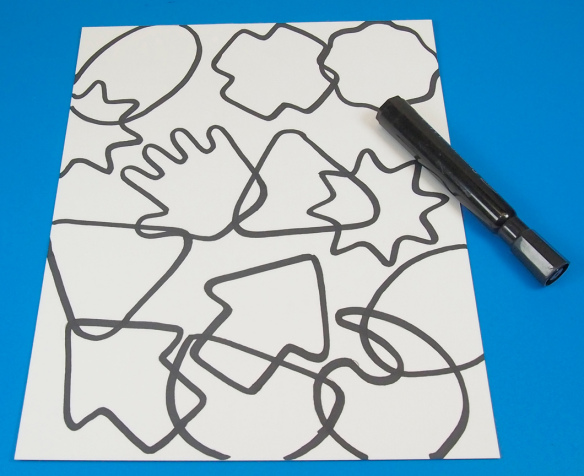
_5272128Trace out one of the simpler shapes onto the paper sheet. Use pencil to make the tracing. If you make a mistake, you can always go back and erase it. Choose a completely different shape and place it partly over the first drawing. Trace the inside of the shape and remove the stencil. This will result in an overlapping stencil artwork!

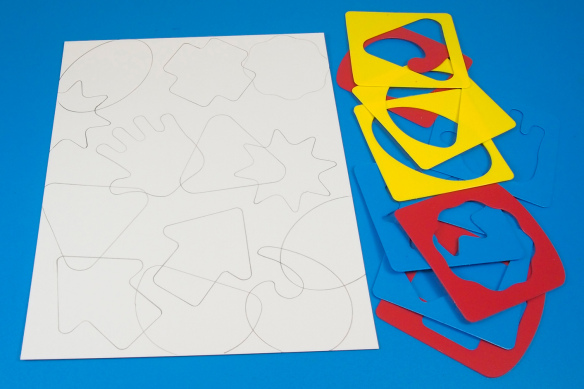
_5272129Adjust the directions of the shapes as you overlap them. Only overlap large areas of the stencils to help with the coloring later on. Fill the whole page with as many shapes as you can.

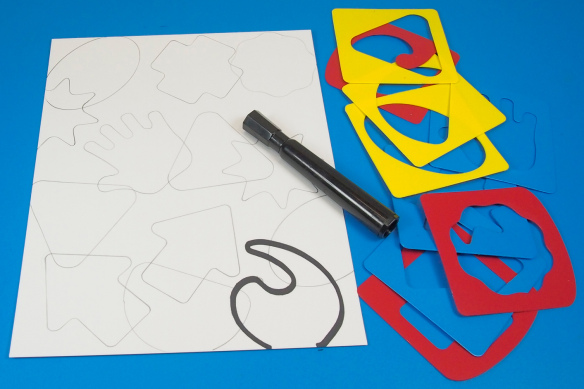
_5272131Go back over top of the pencil lines with black marker. This will help you clearly see all the areas you have to color in.

_5272135Clearly outline all of the shapes with black marker.

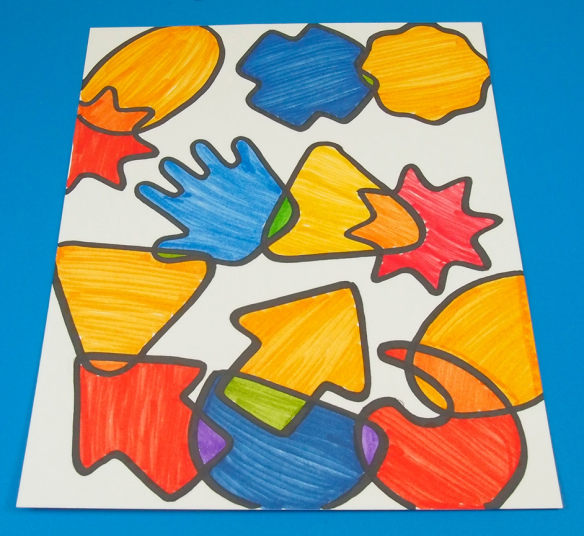
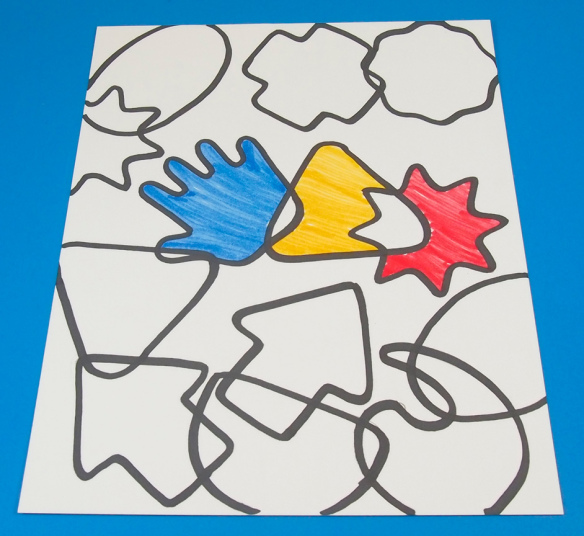
_5272136Choose basic colors for each of the shapes. If you are teaching primary colors and color combinations to students, give them only red, blue and yellow markers to color in their art. Fill in the main part of the shapes with one color. Leave blank the parts that overlap.

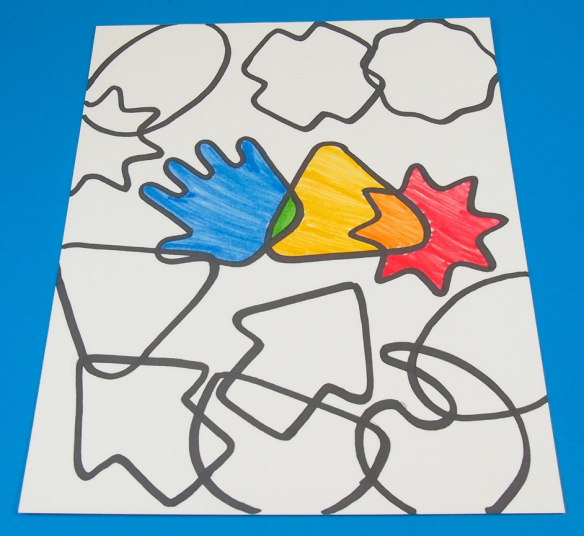
_5272138Now comes the fun part! Think about what color is created when red and yellow combine–it’s orange! What about yellow and blue? That’s easy–green! Fill in the overlapped areas of the shapes with these combination colors, also called secondary colors. Learn about tertiary colors as well!

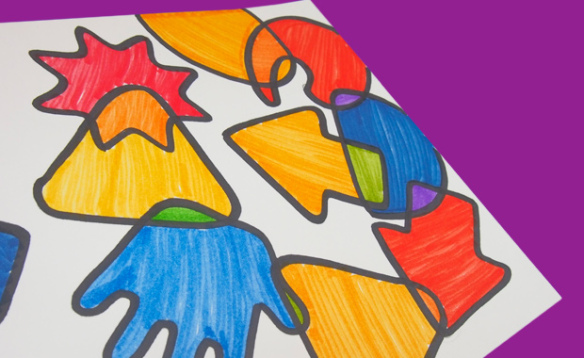
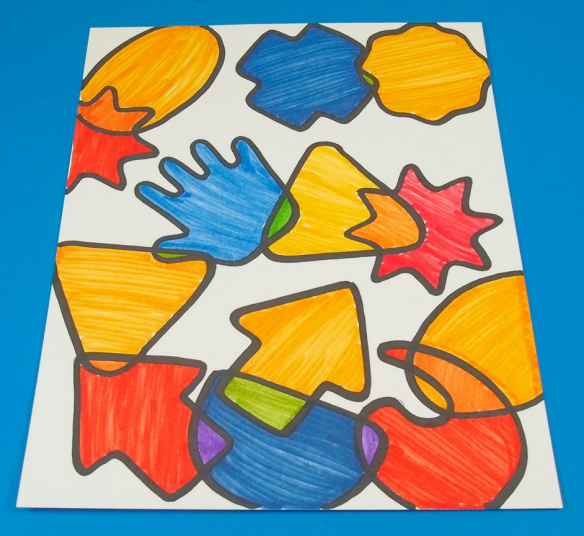
_5272141All filled in! You can see the secondary colors that appear in the overlapped parts are either green, purple or orange.

Give students a range of materials to experiment with as they discover new colors! Use paints instead of markers. Paste on collage materials with similar colors onto specific sections; then mix up the contents in the overlapped areas and see what happens! Do you still see different colors?

Line-10

What shape is your artwork in? Show us your color combinations and fun stencil artwork by sending us photos! Contact us through the contact form. We will post up your art in one of our upcoming posts!

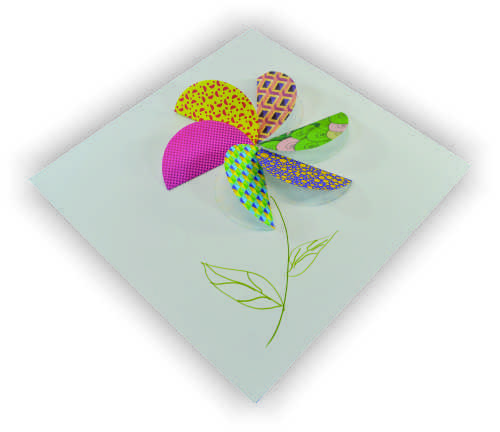
3D Craft Circle Flower

3D flower finisged craft.jpg

These beautiful flowers will flutter in the breeze!

Age: 3+

Duration: 7-10 Minutes

Learning Outcomes: Exercise fine motor skills. Explore early paper sculpting. Create beautiful take-home artwork.

You’ll Need:

Line-14

  1. Choose six of your favorite craft circles and fold them in half. The colored side should be on the outside.
  2. Arrange the half circles in a full circle on your sheet of paper.
  3. Using a glue stick, apply glue to ONE HALF of the folded circles.
  4. Glue the folded circles to the sheet of paper in a circle configuration. You want the top halves to be loose and fluttery, so make sure you don’t overlap the circles.
  5. Add a stem and leaves with a washable marker.

The results are beautiful artwork that is perfectly fridge-worthy!
Ideas

  • Tape our tissue circles to the inside of your folded circles to add a pop of color!
  • Add an emotional component to the activity. Challenge students to draw six different emotions on the white side of the craft circles before you fold and glue them. Your flower will show a range of different feelings!

Line-03

Like us on FacebookShare this post with your friends, or Subscribe to this blog today to receive original craft project updates every week!

Beautiful Birch Bark Baskets

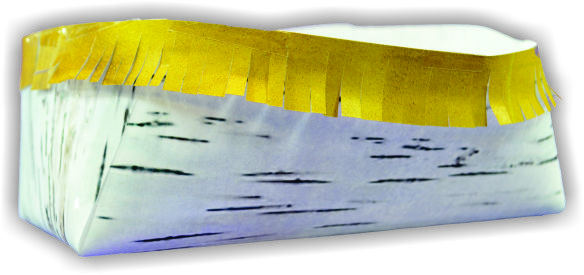
Birch bark Basket Style 1.jpgThis quick and easy cultural craft is also useful both inside and outside the classroom!

This kid-friendly take on a traditional craft is a beautiful take-home piece, but if they stay in the classroom, they’re great for holding pens, pencils, manipulatives and other small personal items.

Age: 4+

Duration: 5 minutes (including printing time)

Learning Outcomes: Explore the tensile strength of paper and it’s similarities to birch bark. Learn about using natural materials to create art that is both beautiful and practical. Exercise fine motor skills by cutting and taping.

You’ll Need:

Line-12

Birch trees are found all over North America and Eurasia and before the widespread use of pottery and ceramic containers, birch bark and wood were the most flexible materials available. The wood and bark of this tree were used by a variety of cultures. Native American and First Nations birch bark baskets might be one of the better-known uses for birch bark, but native peoples in North America also use birch bark for canoes, wigwams and tinder.

Asian countries (including Siberia, Ancient China and Ancient Assyria), Scandinavia and Finland used birch bark to make storage containers, roof coverings and waterproof coverings for bows. In Russia and India, birch bark was used to record manuscripts before the availability of parchment, vellum or paper. Some of the oldest known Buddhist texts were written on Birch Bark.

Our paper version of this ancient craft is quick and simple. Start by downloading the Birch Bark Basket template. The template contains two different style of basket. Print out the templates on a sheet of craft paper. It may take some experimenting to see which way you need to put the craft paper into the printer so the lines print on the white side. We used the birch bark design for our basket, but you can choose your favorite paper! These templates would also work well with our R15294 Terrific Tree Craft Paper.

Once you have printed out the templates, cut along the solid lines. To construct your basket, simply overlap the edges of the template and tape closed. We have created a video to demonstrate the construction:

Once your basket is ready, you can add embellishments. We used the leather design paper to create a fringe for our basket, but you can leave it plain too.

Line-11

Like us on FacebookShare this post with your friends, or Subscribe to this blog today to receive original craft project updates every week!


Make Marvelous Marble Marquetry

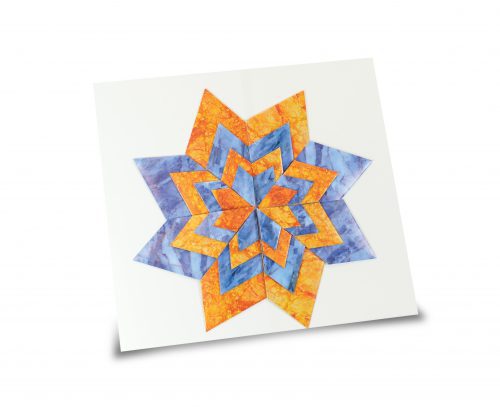
15401 Marble Paper - OrgBlue Mosiac

Marquetry is the art of using thin pieces of veneer to craft beautiful images and patterns. Now you can create your own beautiful marble marquetry! 

Age: 5+

Duration: 15-30 minutes

Learning Outcomes: Practice fine motor skills while you cut and fold. Encourage early geometry by talking about different shapes, patterns, and types of symmetry.

You’ll Need:

Line-17


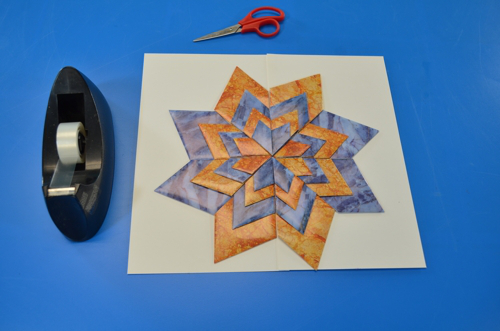
This craft looks like marquetry, but it actually combines a marquetry effect with a technique we call Shapegami. Start by downloading and printing the Shapegami Folding Instructions. This set of instructions includes step-by-step folding instructions for ten different shapes, basic geometric vocabulary, and design ideas. Start by taking the time to discuss different shapes and their attributes! Each of these shapes can be folded with an 8 1/2 x 11″ sheet of paper AND with the special sized rectangles in the marquetry template.

Once students are familiar with the different shapes, they can practice folding them with white printer paper and start thinking about the design they want to make with their shapes. Students can design their own marquetry designs, or choose from the Shapegami idea list. I decided to create a flower design using folded kite shapes.

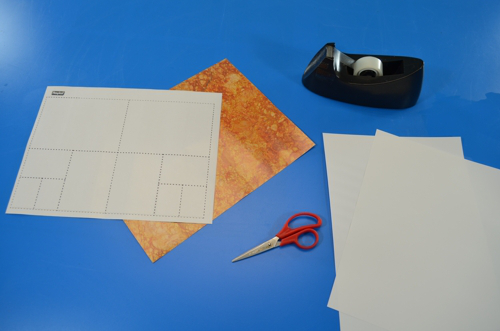
Once students feel confident, break out your Marble Paper and download the Marble Paper Marquetry Template. It may take some experimenting to see which way you need to put the craft paper into the printer so the lines print on the white side. I used the orange and blue sheets to create a strong color contrast, but you can choose any sheets you like!

marquetry 1

Start by carefully cutting out the variously sized rectangles. To make each size easier to find, I sorted my rectangles by size as I cut them. Once your rectangles are all cut out, it’s time to start folding! I folded all my rectangles into kite shapes, keeping them arranged by size. This makes it easier to compose your marquetry design.

To create your marquetry design, start with a piece of white paper. Beginning with the largest of my kite shapes, I used loops of tape to secure each shape to the paper in the design I wanted.

Simply repeat this process using progressively smaller folded shapes, and you will have created a beautiful piece of geometric marquetry art!

marquetry 8

Line-17

Like us on FacebookShare this post with your friends, or Subscribe to this blog today to receive original craft project updates every week!

Spotlight On: Stand-Up People

53001 Collection 2

Create cute, miniature people who can stand on their own two feet!

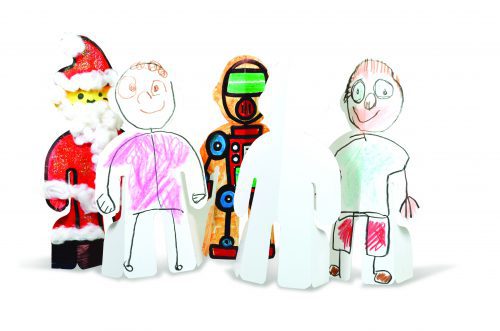
These sturdy card stock figures are terrific for a multitude of different art projects and as components in presentations for other subjects. Use paint, marker, crayon, pencil crayon and collage materials to decorate your stand-up person. The large size (7 1/4 x 11 1/2″) is perfect for bringing out the fine detail in your artwork.

Use these art bases for “All About Me” art! Glue a photograph to the face of a figure, and decorate the body to resemble your favorite outfit. Finish by writing your name on your stand-up person so your classmates will always recognize you!

Create an abstract self-portrait! Try using our paint pad with tempera paints to create a colorful base. Then gently press a card person into the paint. Remove, and allow to dry. Then tape a photograph of yourself to the face! For more about using our paint pad to make beautiful pints, check out this blog posts.

A great first week of school activity is pairing students off and challenging them to introduce their partner to the class! Have students interview each other, and create a portrait of their partner to present to the class along with personal facts like age, favorite food, and favorite color!

Are written book reports starting to become a grind? Add a new dimension to them by challenging students to create a portrait of their favorite character in their book. The portrait can serve as a visual aid to help keep other students engaged.

Bring social studies to life with historical figures! Consider assigning each table (or group) a theme, and each student will create a portrait of a different historical figure. If students have a math theme, they might create figures of Ada Lovelace and Pythagoras. A science theme could include Einstein and Marie Curie.

Line-14

Like us on FacebookShare this post with your friends, or Subscribe to this blog today to receive original craft project updates every week!