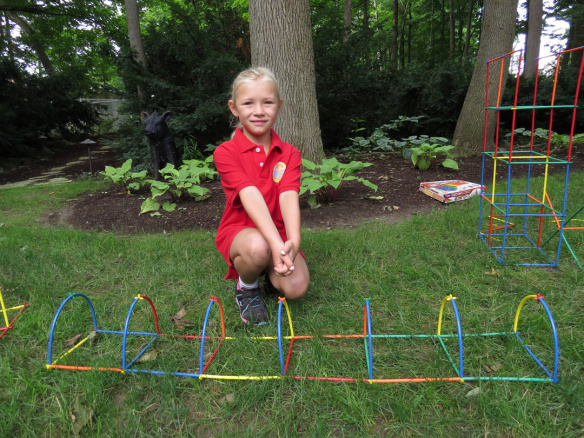
Squarehead Teachers: Straws and Connectors Giveaway!

connectors-giveaway-2

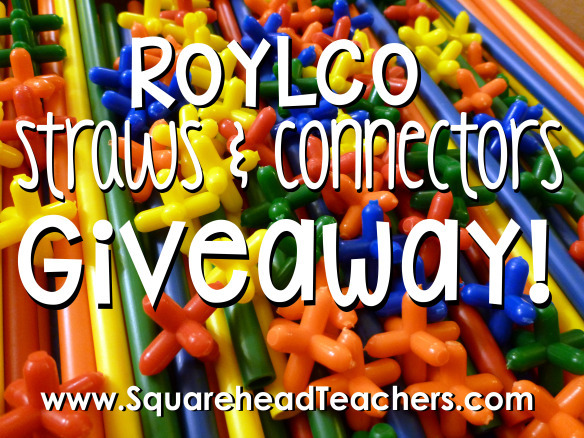
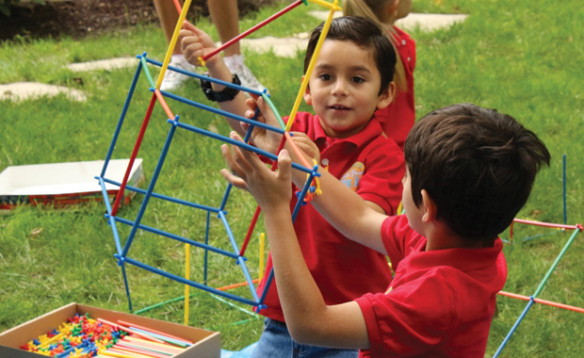
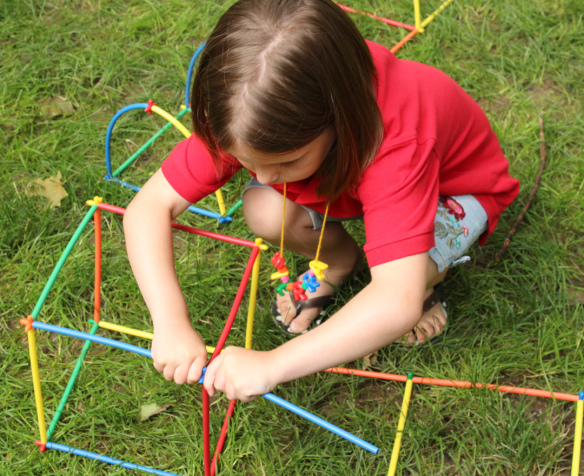
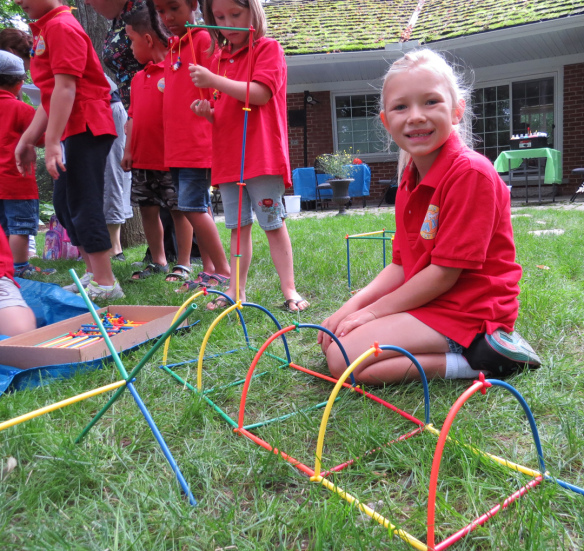
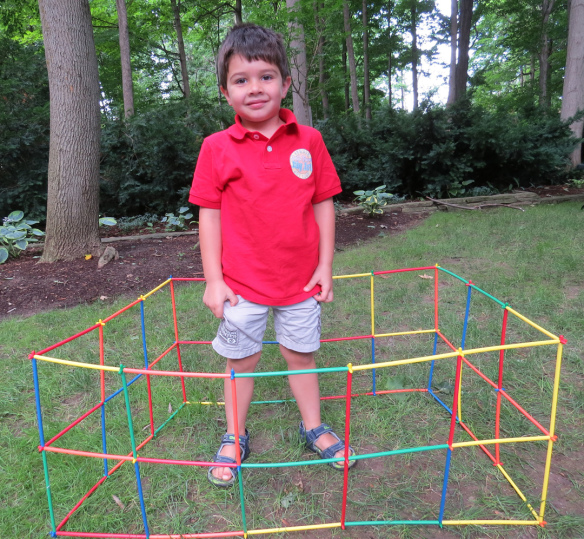
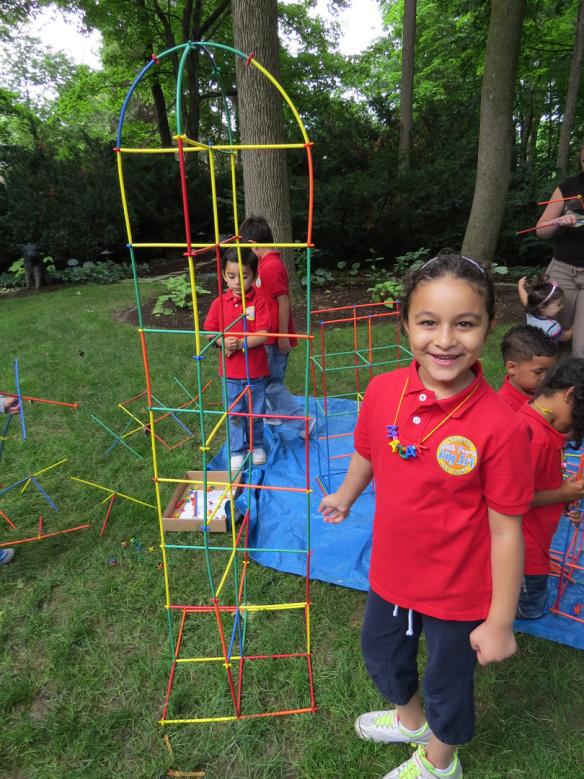
Head on over to Squarehead Teachers and complete the challenge to win a FREE box set of Straws and Connectors! Contest ends December 16, 2014 at midnight.

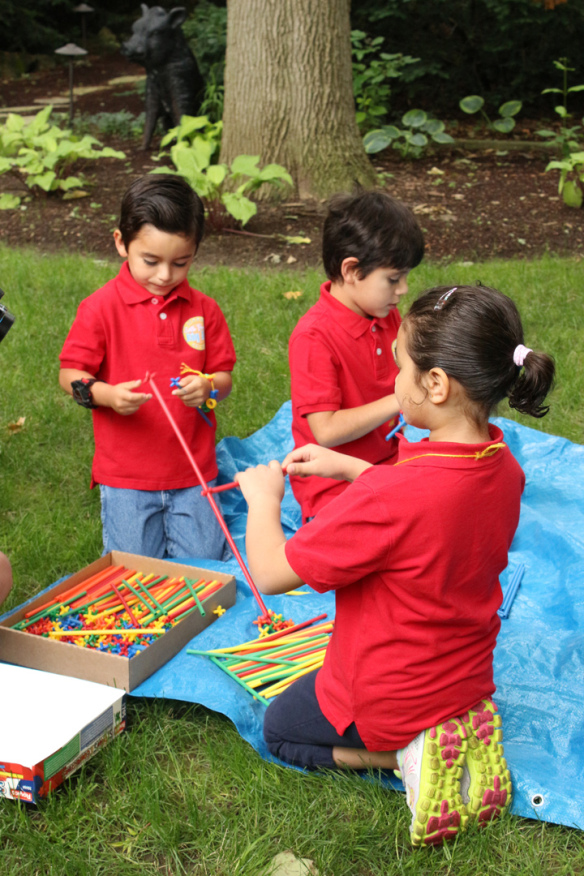
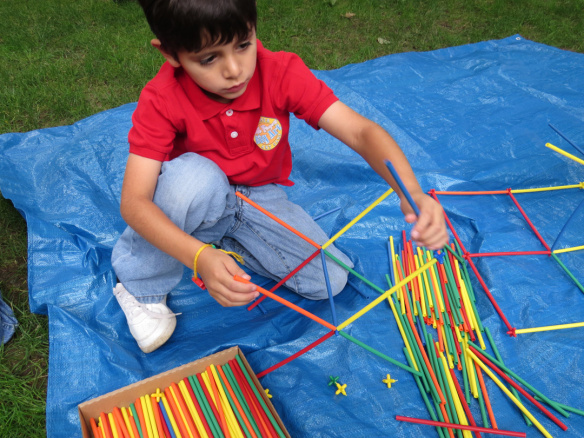
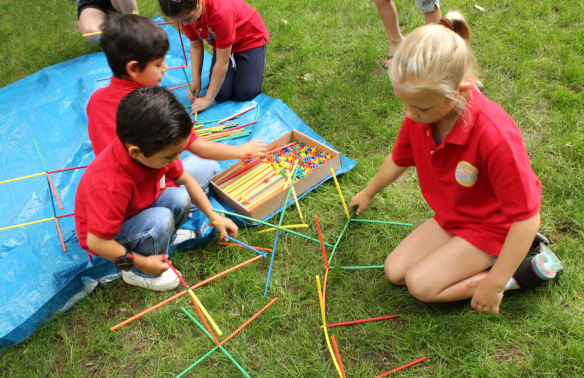
The Straws and Connectors set is an awesome gift to give your kids or classroom of students this Christmas! Build and design beautiful structures or new shapes. You can learn more about the Straws and Connectors in our recent post at the link or visit the giveaway on SquareheadTeachers.com for more details!

The giveaway post features a full detailed description about the Straws and Connectors with gorgeous photos of various constructions! Check out the full post for contest details.

Are you stumped on where to find lesson plans for your grade-school classroom? Covering a specific unit and can’t find any ideas for it? Be sure to check out Squarehead Teachers! Besides providing you with a variety of amazing FREE PRINTABLES, you gain access to a wide range of subjects for any occasion. Use the resources for any educational space; learn at home or in the classroom with inspirational ideas.

cropped-blog-header-4-christmas-copy

Thank you to Mindy @ Squarehead Teachers for hosting this giveaway! 

Images © Squarehead Teachers

Line-06

Like us on FacebookShare this post with your friends, or Subscribe to this blog today to receive original craft project updates every Monday, Wednesday and Friday!

Guest Post: Straws and Connectors, Autumn Leaves Paper Bits and Dry Erase Classroom Tunics

2014-12-09

Here’s a sneak peek at a few ways our creative crafters used some of our products! All these photos were sent in to us by people who would love to share their ideas. So take a look around, and get acquainted with some projects you could use in your own educational space!

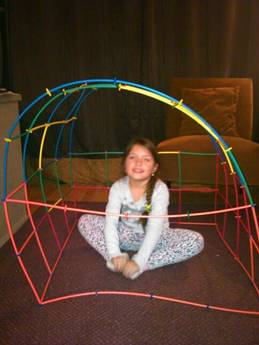
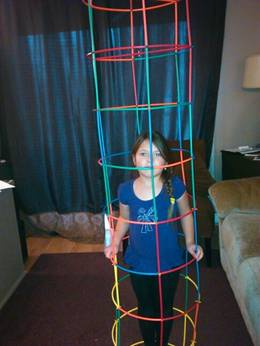
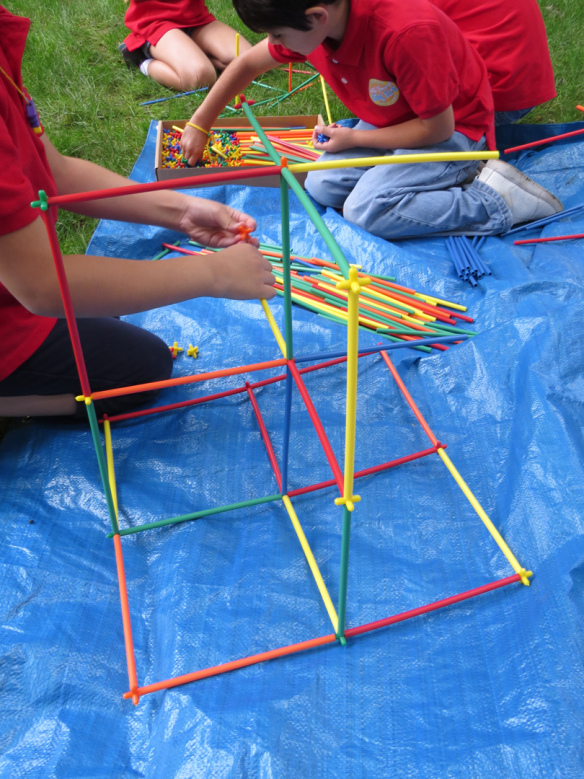
Our first few photos show how the Straws and Connectors were used for building large and tall structures that the kids could climb inside of. We provide each kit of Straws and Connectors with a reference guide for building these kinds of structures and more! Use the diagrams as a basis for designing your own creations.

2014-12-09-2

We used the Straws and Connectors structures as the inner designs for our Color Diffusing buildings. We painted large sheets of Color Diffusing Paper with watercolors. Once the sheets were dry, we wove them in and out of the gaps in the design. Check out the beautiful photos of this project at the link!

2014-10-06

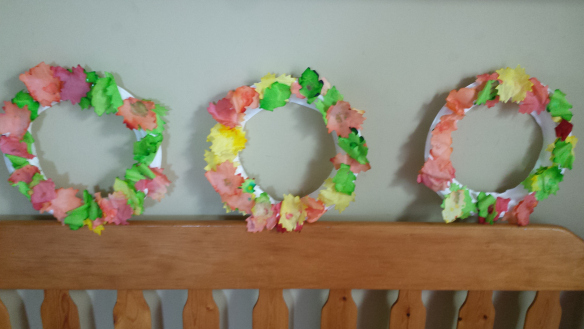
These gorgeous wreaths were made with our Autumn Leaves Paper Bits! The clever design used a card wreath cutout. The crafters then glued the leaves on top. Alternatively, you could use a paper plate and cut out the center to use as the wreath base.

The video below shows a basic project you can try with the Autumn Leaves. This simple craft uses construction paper and the leaves to make a 3D-looking tree.

2014-12-09-05

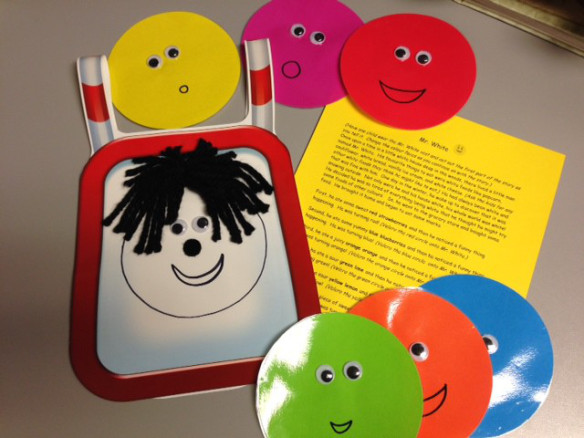
Finally, our last photo reveals what this teacher decided to use her pack of Dry Erase Classroom Tunics for! Although the Classroom Tunics can be used for temporary notation–such as using dry-erase markers to write numbers or letters on them–there are many other uses for them! For instance, this teacher laminated circles in different colors and pasted them onto various Classroom Tunics. Using a story about introducing the colors of the rainbow, she had several of her students act out the storyline while wearing the tunics. It’s a great way to engage the class on multiple levels–learning literacy, colors, order and sequencing, and group collaboration!

Line-13

Thanks to our subscribers for sending us photos of their work! If you would like to send us your photos in order to be featured in our next Guest post, please contact us through the contact form! We’d love to hear from you!

Like us on FacebookShare this post with your friends, or Subscribe to this blog today to receive original craft project updates every Monday, Wednesday and Friday!

Project Spotlight: Snowflake Weaving Mats

2014-12-08-FeatureImage

Add beautiful snowflakes to your winter display with artwork your students get to make!

The R16027 Snowflake Weaving Mats kit contains 24 projects for your classroom in four unique snowflake designs. What sets each of your students’ snowflakes apart from each other is the addition of our patterned weaving strips. There are plenty of designs for students to choose. Mix and match different combinations of weaving strips for a beautiful bold look!

Weaving is a great way to encourage fine motor development as it forces fingers to expertly pass the strips over and under the slots in the weaving mat. Remember to alternate the start for each strip as you go!

When you are finished weaving all the way to the bottom of the mat, snip off the ends of the paper strips and tape the finished weave down.

You can see the process for weaving at the link below:

[youtube https://www.youtube.com/watch?v=dZM9688k1z8]

Hang up your finished snowflake designs on a display wall. Alternatively, write the name of each student on his or her snowflake and hang from the ceiling for a lovely mobile decoration.

Line-12

Like us on FacebookShare this post with your friends, or Subscribe to this blog today to receive original craft project updates every Monday, Wednesday and Friday!

Tissue Paper Button Wreath

2014-12-03-FeatureImage

Start the Christmas decorating with a simple take-home ornament! Children younger than 5 years can experience the joy of making their own decorations with standard materials you will find in your classroom.

Age: 3-5 years

Duration: 10 minutes

Learning Objectives:

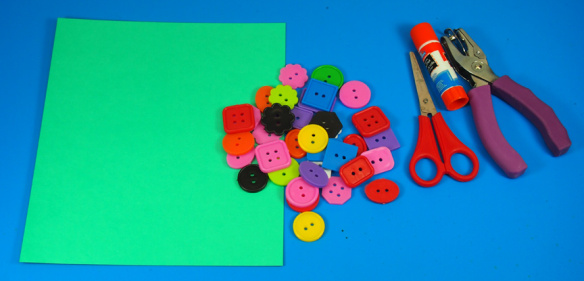
You’ll Need:

R22052 Double Color Card Sheets

R2131 Bright Buttons

R2172 Tissue Circles

• Gluestick

• Scissors

• Pencil

• Hole punch

Line-21

This wreath is nice and compact to be hung off a doorknob or can be tacked to the center of a child’s room door. Hang up on a tree for a rustic “crafty” look!

P1015821

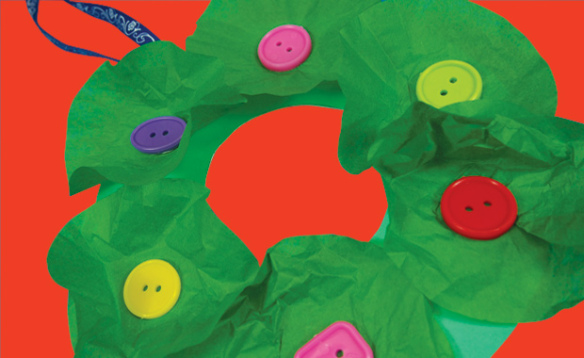
We are going to make a simple wreath out of tissue paper and card paper, using the buttons as ornaments to decorate it. Use coordinating colors to make your wreath. You don’t have to make the wreath exclusively for the holidays. Instead, you can adapt it based on different colors that are relative to various seasons! Test out different combinations of colors and materials to see which work best.

P1015822

Let’s start with making the wreath.

P1015823

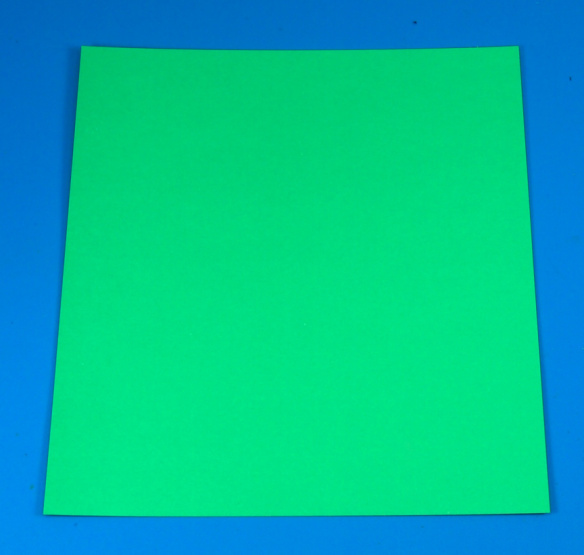
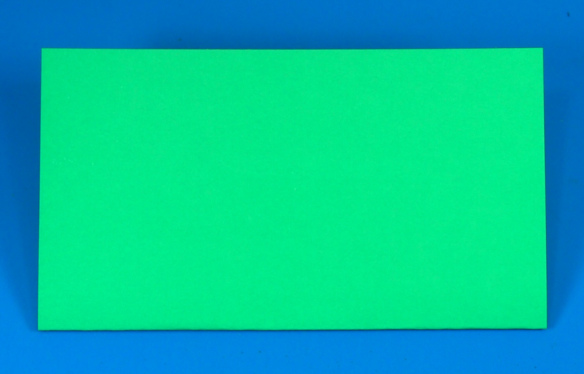
Fold the sheet of Double Color Card sheet in half.

P1015824

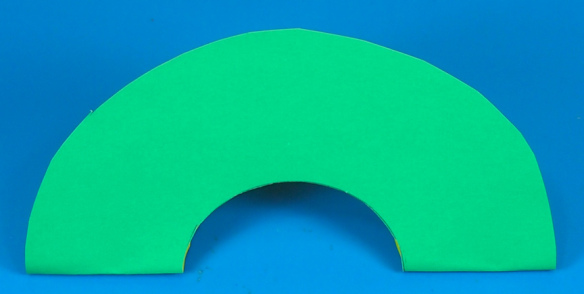
Use scissors to cut a small semi-circle out of the center of the folded sheet. Cut off the corners of the folded sheet and round out the edges to form a larger semi-circle.

P1015825

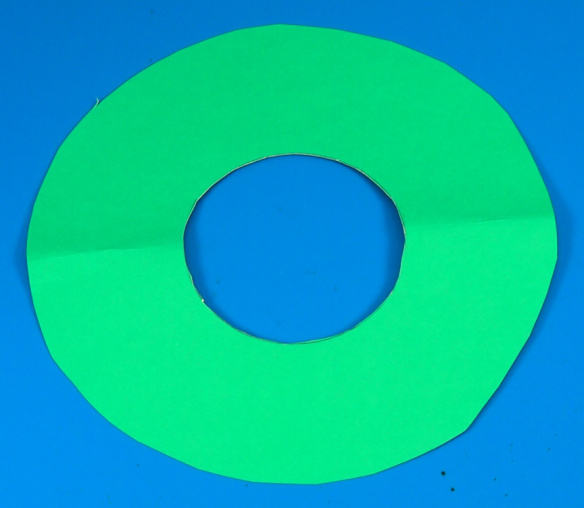
Now, unfold the wreath.

P1015879

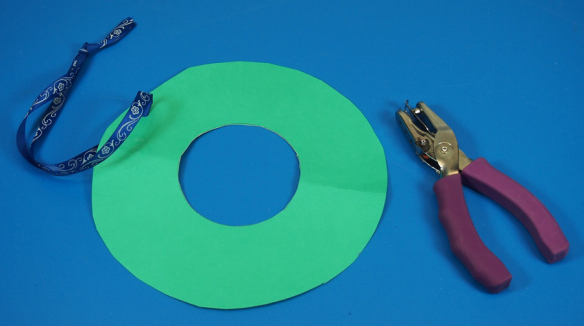
Punch a hole into the top of the wreath. Cut a length of decorative ribbon and thread through the hole. Tie a knot at one end.

P1015881

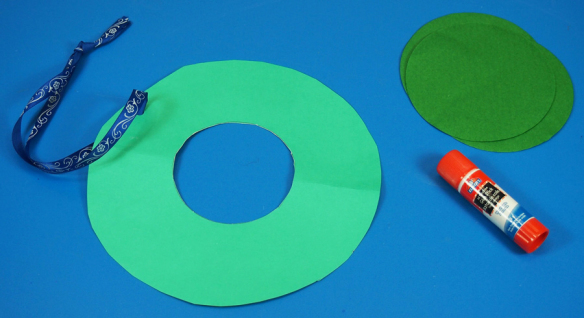
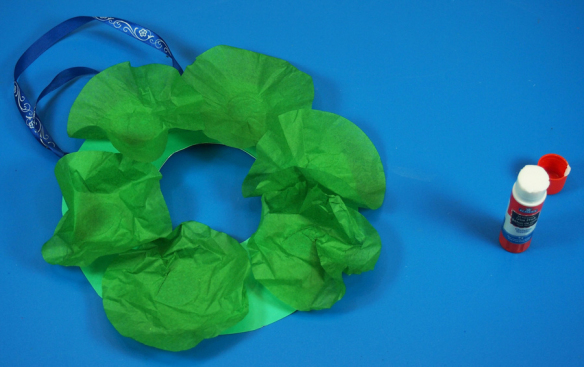
To add texture to your wreath, you will need to use our Tissue Circles, or find scraps of green tissue paper in your scrap paper box.

P1015882

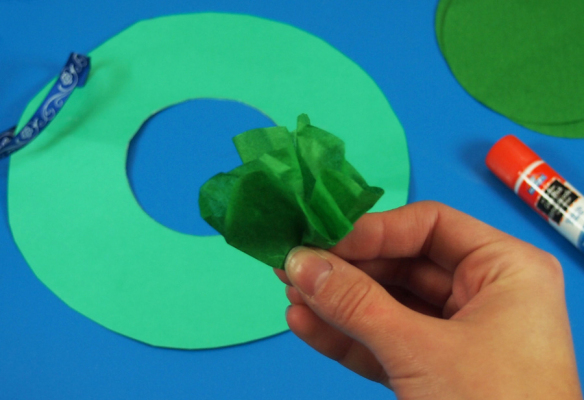
Take a scrap of green tissue paper and scrunch it in the center. Pull out the surrounding paper, much like you would when stuffing tissue paper into a gift bag.

P1015883

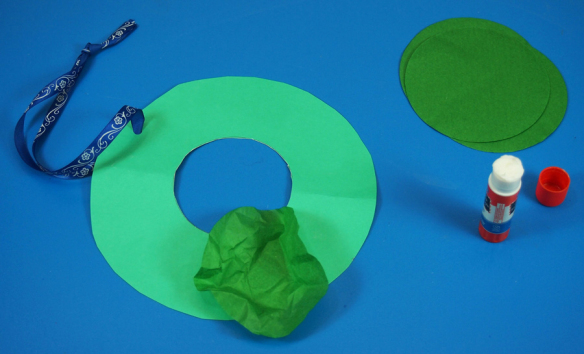
Dab a bit of glue onto the wreath and press the scrunched tissue paper on top.

P1015885

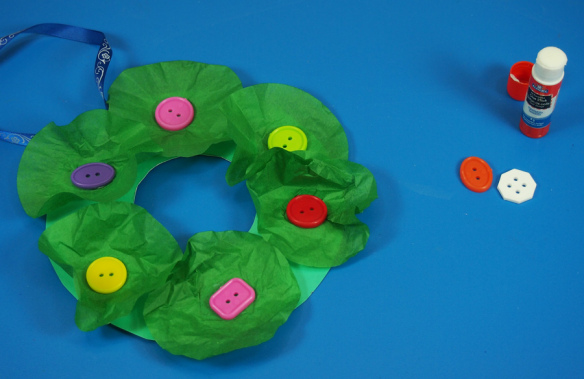
Add more tissue paper scraps all the way around the wreath.

P1015889

Glue a Bright Button onto the center of each tissue paper section. Enjoy a beautiful but easy-to-make decoration for this holiday season!

Line-14

Like us on FacebookShare this post with your friends, or Subscribe to this blog today to receive original craft project updates every Monday, Wednesday and Friday!

Light Cube: Glowing Art by Twins At Play!

IMG_5045

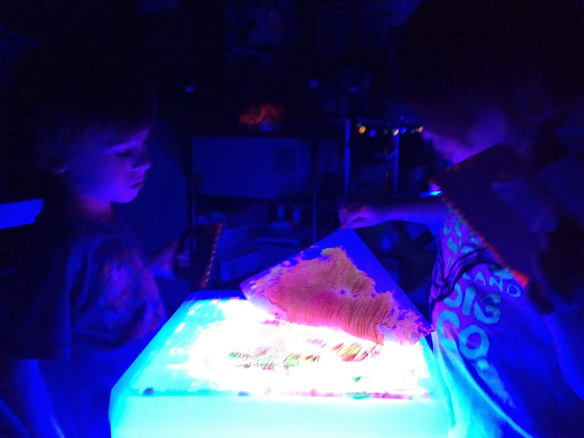
Kristen from Twins at Play is featured in another great post about the Educational Light Cube. In this edition, she gets her twins to play with neon tempera paints and black lights on the Light Cube!

To see the full post, please view HERE!
Kristen says:
“My twins had such a blast with this activity!
We used:
 
neon tempera paint, 
and printer paper
IMG_5046
 
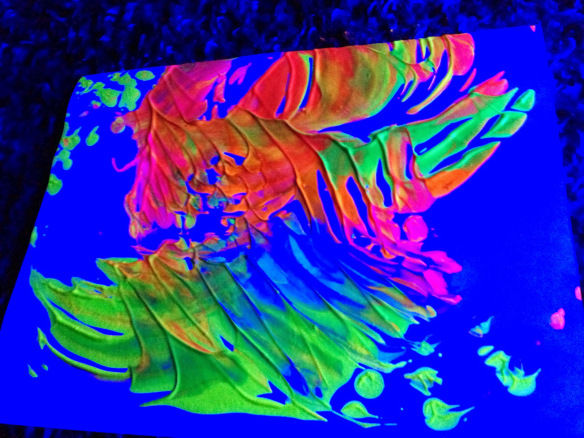
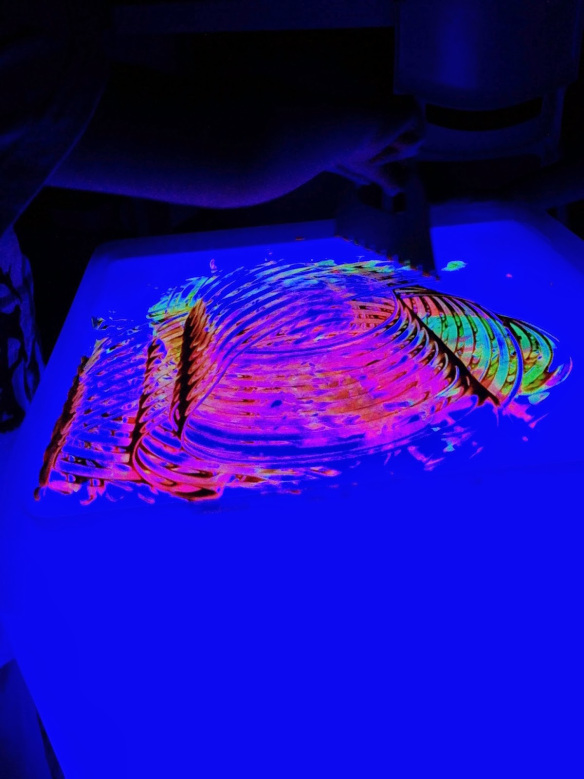
With the Educational Light Cube remote control, we turned the light cube to on one of it’s blue hues.  We switched around between blues and purples. We also turned on a few black lights. I put one of the Educational Light Cube trays from the accessory pack on to the light cube, then squirted some neon tempera paint right on to the tray. After that, I gave my twin boys paint scrapers and let them make designs, then they pressed printer paper on to the paint, gently pushed down and gently lifted the paper. They ended up with very pretty Art prints!
IMG_5058
We did this before bed, there was very little clean up.
This can be done in daylight with regular colored tempera paint too!”
Thanks to Kristen @ Twins at Play for putting together this awesome post!
Images and Text © Kristen from Twins at Play blog

To see more about our R59601 Educational Light Cube, visit here!

Line-16

Like us on FacebookShare this post with your friends, or Subscribe to this blog today to receive original craft project updates every Monday, Wednesday and Friday!

Project Spotlight: Really Big Origami Paper

2014-12-02-FeatureImage

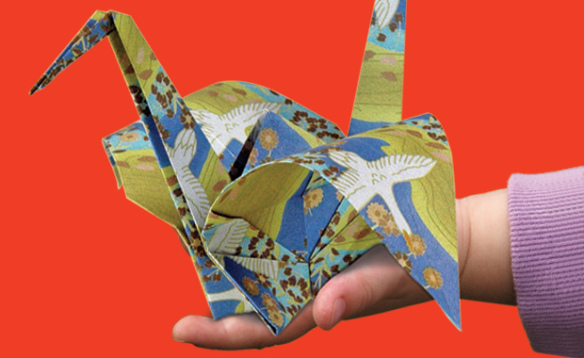
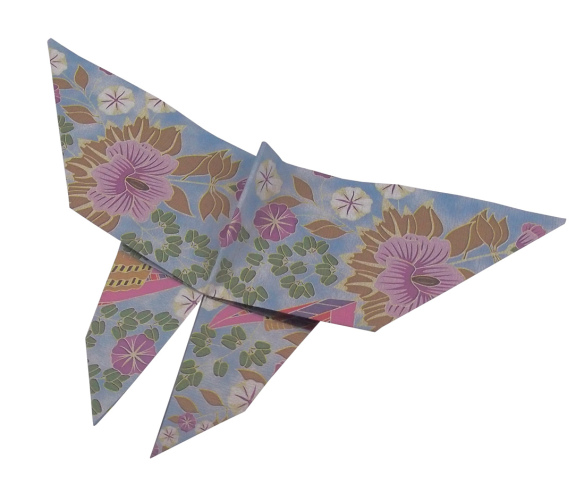
Fold perfect origami ornaments or use as wrapping paper! The R15208 Really Big Origami Paper designs are beautiful and ornate, doubling as festive paper for this holiday season!

The sheets are perfect squares at 12 x 12″ (30 x 30 cm) making them the perfect cut and size for practicing to fold complex origami designs. Don’t work with standard sized paper that needs to be cut and prepared ahead of time. Start immediately folding gorgeous paper sculptures.

Origami-Butterfly

There are 6 different designs that you can use to make your origami sculptures. To learn more about the different designs, visit our origami page on the blog!

Try some of these project ideas with the R15208 Really Big Origami Paper!

You can view each of the folding techniques step-by-step in our exclusive videos below! Simply click on any of the animal origami links to view more:

Origami Fish  

Origami Frog

Origami Boat

Origami Crane

Origami Bird

Origami Butterfly

Once you are finished folding up your origami designs, punch a hole through the top and string through some ribbon to make a loop. Tie off the loop with a knot. Hang the origami ornaments on a crafty Christmas tree!

In addition, make snowflakes with the Origami Paper! We show you how to make beautiful snowflakes with intriguing designs in the R15314 Super Slick Paper video, which you can view here.

Line-16

Like us on FacebookShare this post with your friends, or Subscribe to this blog today to receive original craft project updates every Monday, Wednesday and Friday!

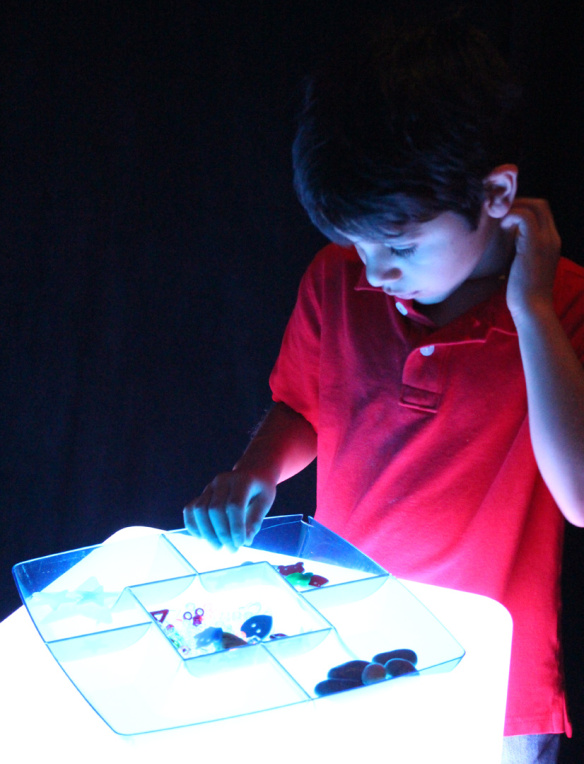
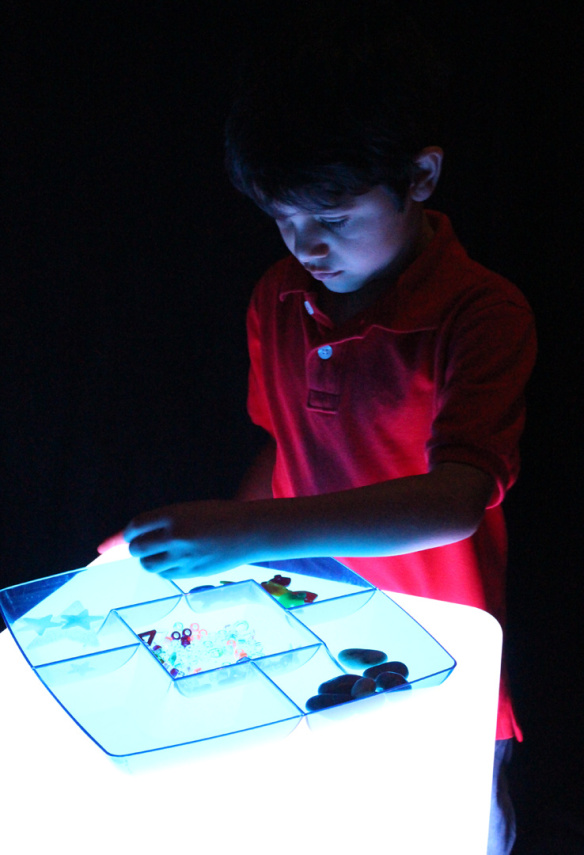
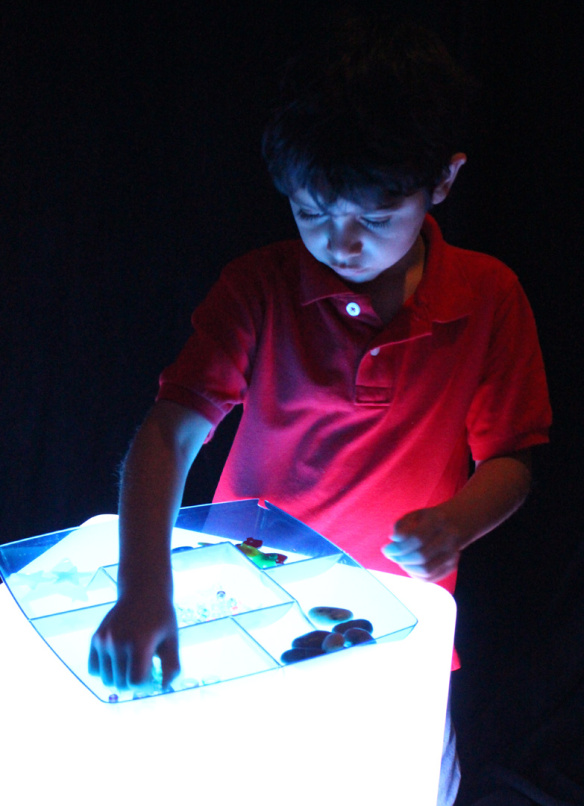
Educational Light Cube: Sorting Manipulatives

2014-11-27-FeatureImage

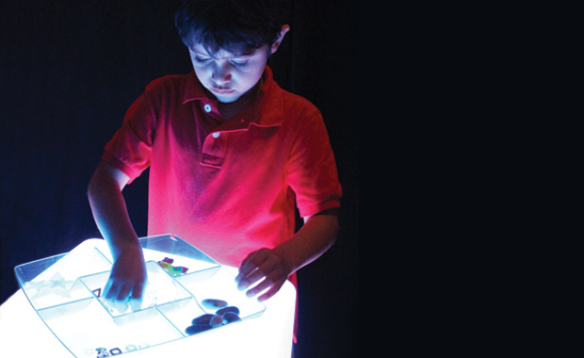
Getting students to sort manipulatives is a double-duty task. While they sort and differentiate between the objects in front of them, students get to exercise their fine motor skills, too!


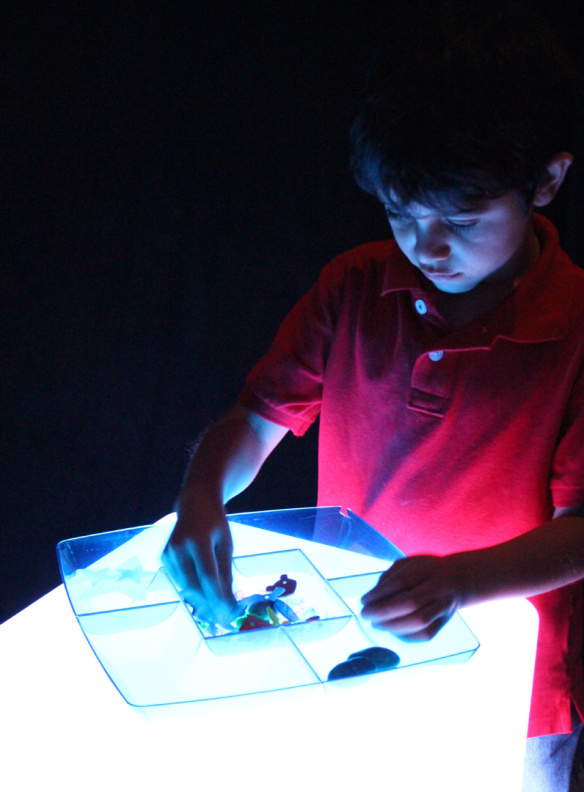
On the R59601 Educational Light Cube, sorting gets so much more fun to do! Turn on the fading function of the Light Cube to gradually cycle through colors. This produces a calming effect on students, getting them to slow down and focus on their task.

IMG_9559

Our first step was to find a snack platter at the dollar store. Use the snack platter to encourage proficiency in identifying like and unlike objects. Gather a variety of different types of manipulatives. We suggest using items such as buttons (R2131 Bright Buttons), letters or numbers beads (R2185 Math Beads and R2184 Manuscript Letter Beads), mosaics (R15367 Heart Mosaics) and more! Place all the manipulatives in the center of the snack platter.

IMG_9561

Ask students to sort through all the different manipulatives and pick out similar ones. Place similar items in one of the snack platter dividers. Repeat for all other items in the snack platter.

IMG_9562

If you cycle through the colors more rapidly on the Light Cube, it challenges students to notice the differences between objects that are transparent versus those that are opaque.

IMG_9566

It’s a great exercise that students will love to try!

More curriculum-based activities on the Light Cube:

Use readily-available materials for counting and sorting

• Build stacking abilities with dollar store party cups

• Find out just how sturdy the Light Cube is!

Share your stories about the Light Cube! What activities do your students use the Light Cube for?

Line-20

Like us on FacebookShare this post with your friends, or Subscribe to this blog today to receive original craft project updates every Monday, Wednesday and Friday!

Christmas Tree Heart Mosaics

2014-11-26-FeatureImage

Christmas is a month away, but what better way to get into the holiday spirit than to build your own tree on paper using our R15367 Heart Mosaics!

Age: 4+

Duration: 10 minutes

Learning Objectives: Layer multiple pieces together. Identify biggest to smallest and coordinate similar colors. Make associations between the shapes in order to create a larger picture. Develop fine motor skills through sorting, placing and gluing the pieces. Discuss triangles as a geometric shape and use

You’ll Need:

R15367 Heart Mosaics

R22052 Double Color Card Sheets

• Glue

Line-06

This is an easy project to do, but makes a great activity for students as they are waiting to transition between class periods or as a thematic holiday art project.
P1015794

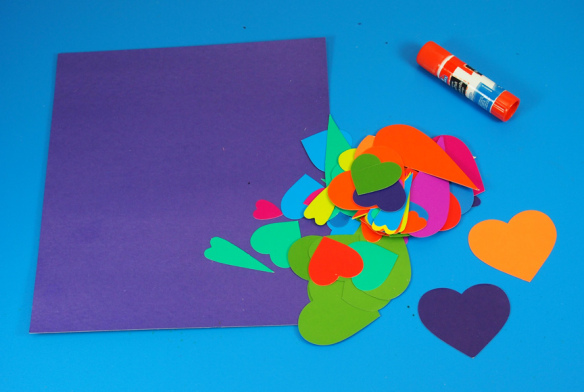
This activity requires very little preparation; all you need are materials that you may already have in your classroom! Give each group of students a pile of Heart Mosaics to sort through. Although we’ve chosen a purple background for our Christmas tree, you can use any color from the Double Color Card Sheets set as a backing to your designs.
P1015796

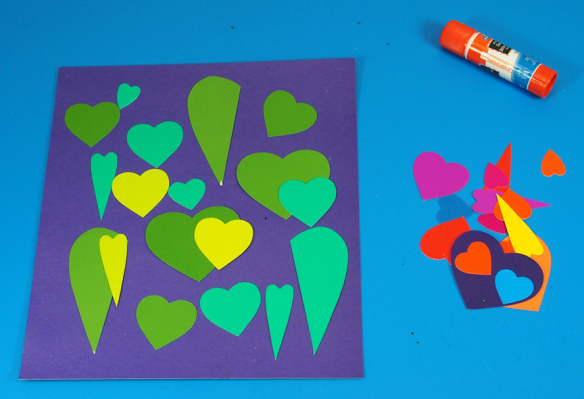
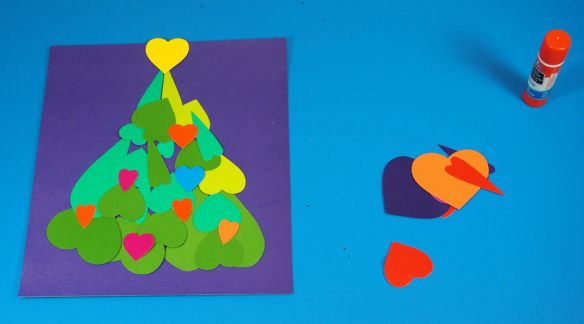
This step allows you to talk a little bit about the basic structure of a Christmas tree. It isn’t just lights and decorations. The shape of the tree is important. Traditionally, most Christmas trees should have the basic shape of a triangle, which is what we are going to make first with our Heart Mosaics.

Ask your students to separate their Heart Mosaics into like colors of green. We have several different colors of green to choose from, so all students will get a chance to make trees.
P1015800

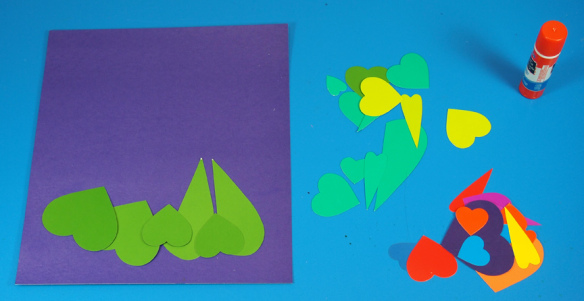
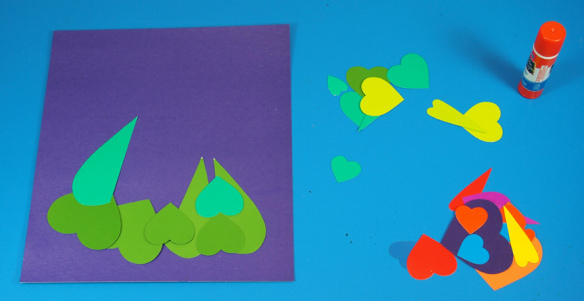
Start with the largest Heart Mosaic pieces first. Locate the largest pieces and place them upside down at the bottom of the card sheet. Make a wide base.
P1015801

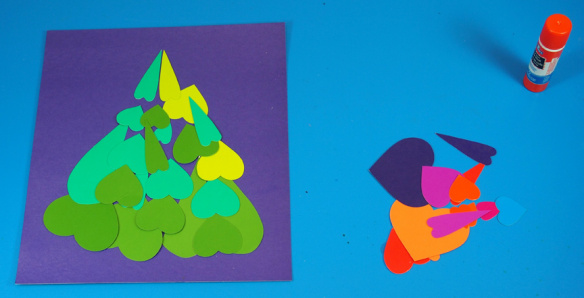
Add a few more upside-down pieces to the base, moving upward. Angle the ends of the Heart Mosaics inwards so that the shape of the overall tree takes on a triangular form.
P1015805

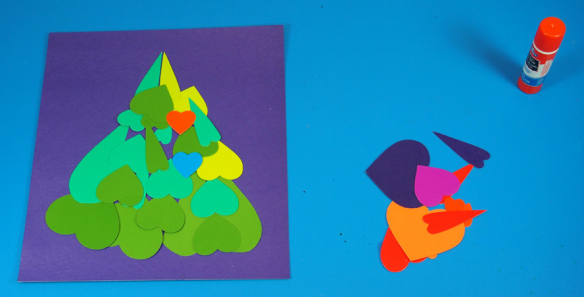
Keep adding and angling the smaller Heart Mosaics inwards as you progress to the top. Choose two small and skinny Heart Mosaics to form the peak of the tree.
P1015807

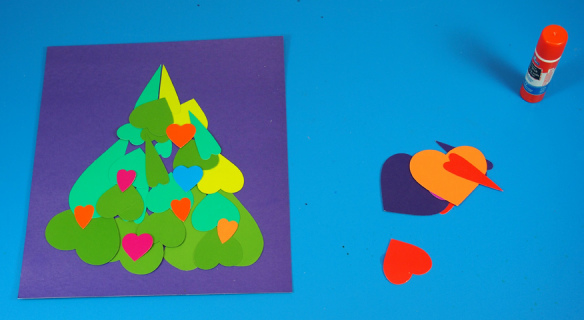
Now it’s time to decorate. Select several smaller Heart Mosaics to form the ornaments as pops of color. Turn the Heart Mosaics right side up and place them on top of the green tree.
P1015812

Decorate the tree just as you would at home! Space out the ornaments in an even, balanced way.
P1015813

Finally, top your Christmas tree with a bright yellow Heart Mosaic. Glue down all the pieces. Students can take their Christmas trees home or tack them up on a board as part of a Christmas display!

Check out another great project with Heart Mosaics:

Make a beautiful tree of hearts for Valentine’s Day cards, for a birthday or just to show someone how much you love them!

Line-06

Like us on FacebookShare this post with your friends, or Subscribe to this blog today to receive original craft project updates every Monday, Wednesday and Friday!

Project Spotlight: Straws and Connectors

2014-11-24-FeatureImage

What’s so great about our Straws and Connectors? Besides the colors, the simplicity of combinations, and the potential for lessons about geometric structure? Learn more below!
IMG_8539

There are two simple components in the Straws and Connectors pack: the straws, which come in a variety of bright and fun colors, and the connectors, which feature 6 prongs to position the straws in any direction.

IMG_0155

The most basic shape that students can easily construct is a square using the straws and connectors. Add on more straws and connectors to fill in the structure and turn the square into a cube!

IMG_0162

Explore more three-dimensional shapes and talk about their properties as students build them.

IMG_8551

The straws are long enough that they can be bent to make curves in the structure, so you are not simply limited to making square structures. It’s a great cooperative material as well! Students can work on separate pieces and combine them all together to make a larger sculpture. This way, children use their skills in coordination, cooperation and critical thinking to create a finished piece.

IMG_8575

We challenged our students to build their own projects separately from each other. Students first had to brainstorm their ideas and then bring their projects to life. Can you guess what this project will be?

IMG_0192

You can see how this art camper continued creating curves in her structure. This perfectly illustrates just how versatile our Straws and Connectors are!

IMG_0245

This art camper made a boat!

IMG_0225

And this is a rocket!

IMG_0237

Straws and Connectors are a perfect gift to your children this holiday season! Give your students the ability to exercise multiple motor functions while creating sculptures they can truly be proud of!

See more about the R6085 Straws and Connectors here:

What else can you make with the Straws and Connectors?

Do you have a Straws and Connectors pack? If so, what kinds of structures did you make with them? We’d love to read your comments below!

Line-06

Like us on FacebookShare this post with your friends, or Subscribe to this blog today to receive original craft project updates every Monday, Wednesday and Friday!